Under the same Design Style tab in Qode Options -> General you can set the main font family that’ll be applied throughout the website.
5. Basic Styling
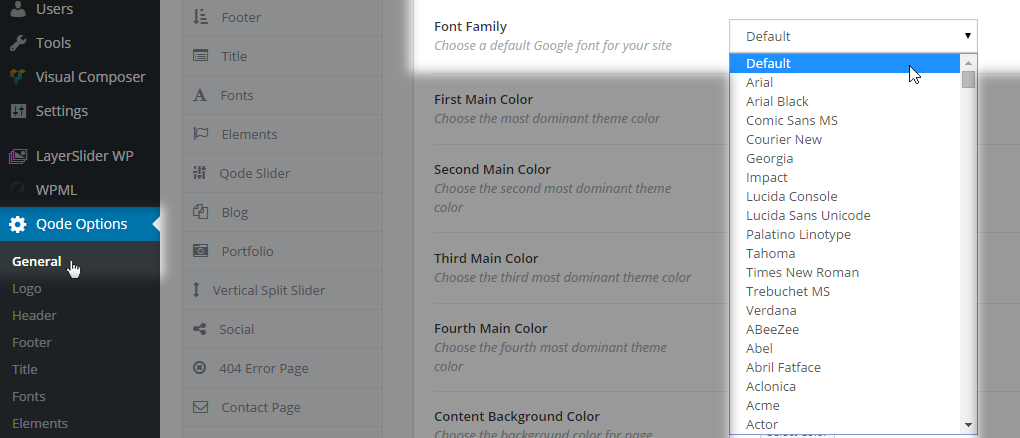
Please have in mind that this is a global setting which will get overridden on a particular section of your website once you get into setting Fonts under Qode Options.
Note - Bridge uses Google webfonts which you can scroll through here.
Tips: For advanced users - Font family setting under Qode Options -> General gets applied directly to the body of the HTML on your website.
RELATED LINKS:
Qode Options -> Fonts
5.1 Colors
By navigating to WP Admin -> Qode Options -> General -> Design Style you can see a basic overview of the coloring schemes of your website.
The main colors are arranged into four groups.
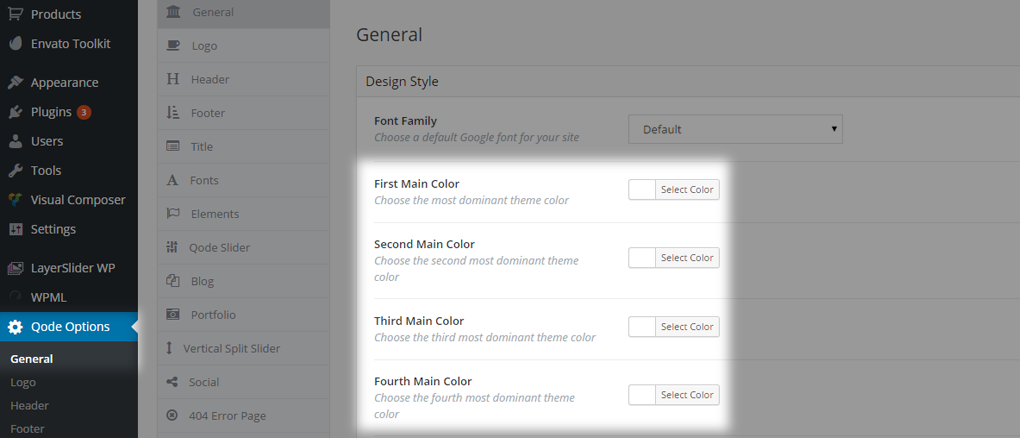
We advise that you arrange these color values to match the global design you’re looking for, without getting too much in detail what each of them effects. Again, these are the very basic colors. The more in-depth we go with setting up Bridge the more precise control you’ll be introduced to, and it’ll be easier to style each element on your WordPress website.
Besides setting these four colors, if you scroll a bit further down you will see a very distinctive color attribute - Text Selection Color.
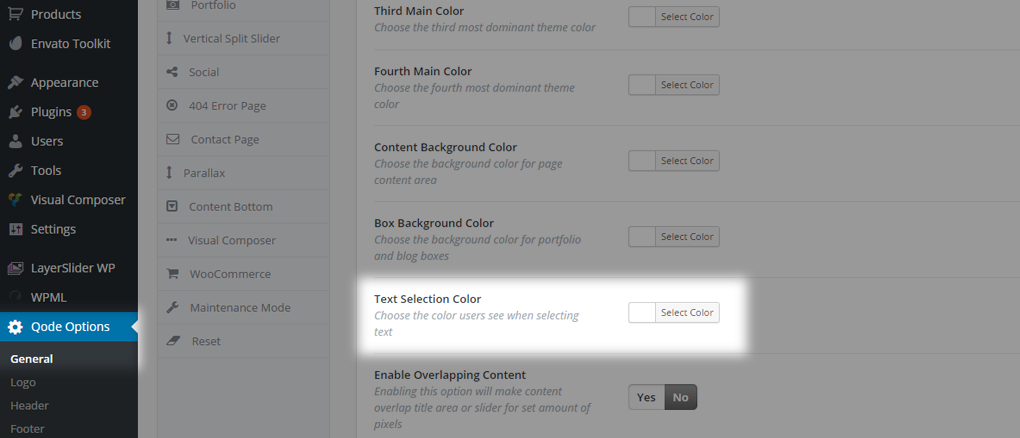
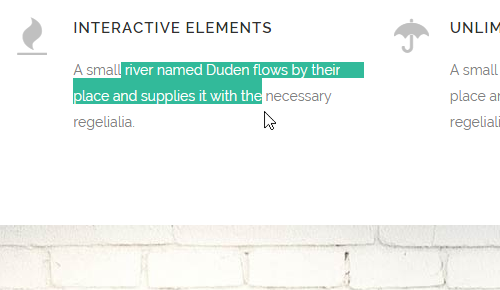
The color you set in this field will appear when you select a piece of textual content on the front-end of your site.
To set an overall color around your content (text, images etc.), you can use one of the two option controls - Content Background Color and Box Background color. The later one being specific to the Masonry Blog and Portfolio List layouts.
Tips: For advanced users - Content Background Color adds the CSS background-color value to the body element in the HTML structure.
5.2 Fonts
Under the same Design Style tab in Qode Options -> General you can set the main font family that’ll be applied throughout the website.

Please have in mind that this is a global setting which will get overridden on a particular section of your website once you get into setting Fonts under Qode Options.
Note - Bridge uses Google webfonts which you can scroll through here.
Tips: For advanced users - Font family setting under Qode Options -> General gets applied directly to the body of the HTML on your website.
RELATED LINKS:
Qode Options -> Fonts
5.3 Page Transitions
Another important setting that determines the entire concept and effects the UX on your website are Page transitions and Loading Animations.
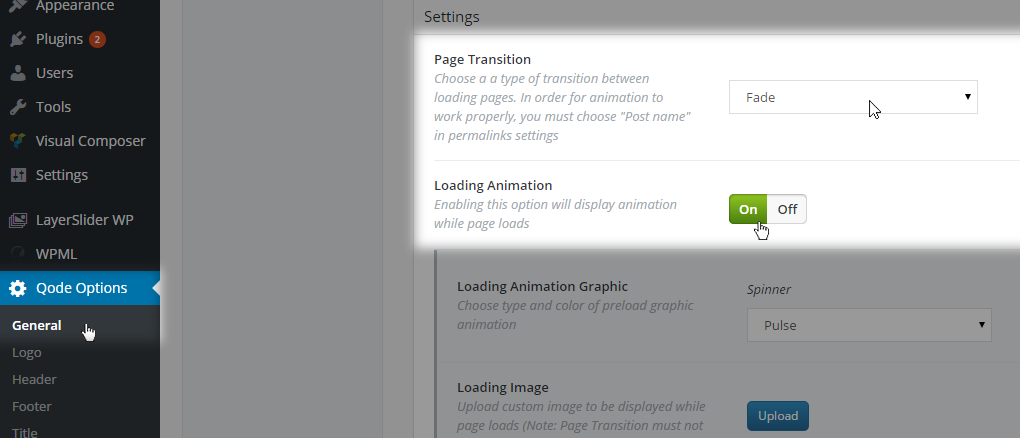
These features are introduced through Ajax. By setting a Page Transition under WP Admin -> Qode Options -> General -> Settings you’ll apply one of the smooth page transition effects that gets triggered when you navigate from one page to another. When the animation is enabled, the Header and Footer will not get reloaded when you click on a menu item. Instead, you’ll just have the content area refreshed.
Loading Animations precede the actual page transition and serve as a preloader. You can choose one of the predefined graphics and set their color, or upload an image of your choice that’ll be displayed instead.
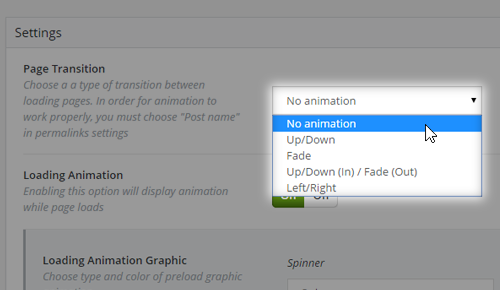
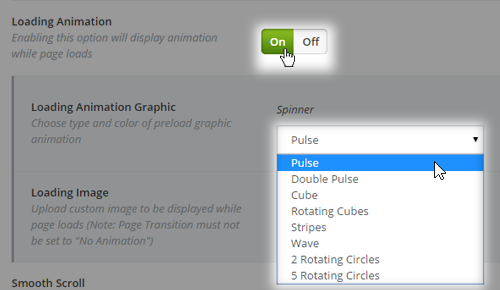
More animation effects will be addressed when we take a look at WPBakery shortcodes.
Depending on the type of website you’re developing, animation effects can be more or less desireable. If you prefer a more straight-forward approach and are looking for the least resource consuming website we advise that you keep the animations disabled.
5.4 In Grid or Full Width Layout
When you want to create a page you usually choose between the Default page template and Full width page template.
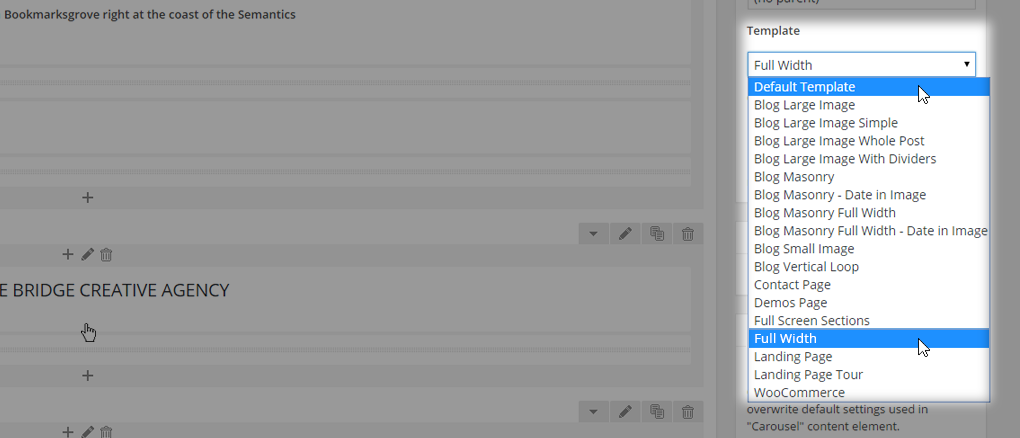
Also when you add a Row element as a container of your page content, you can choose between the In Grid and Full Width type.
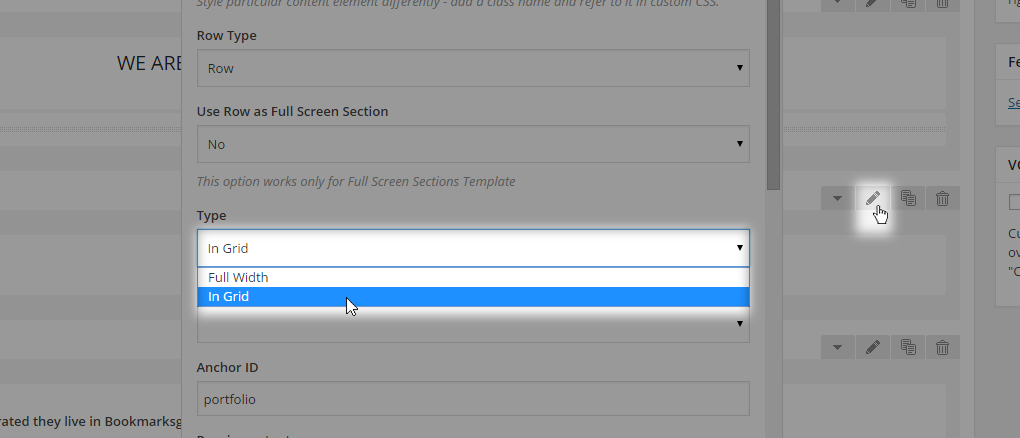
The Full width row type will be applied only if you also choose the Full Width page template, otherwise your row content will be in grid.
If you decide to use the Default template, the usual question is how to add a background image or a background color to the rest of your site - around the content. In this case you’ll have to use the Boxed Layout. It doesn’t matter which page template you choose, if you enable Boxed Layout, all your content will be in grid - within a 1100px wide content area. You can enable the Boxed Layout in the WP Admin -> Qode Options -> General panel.
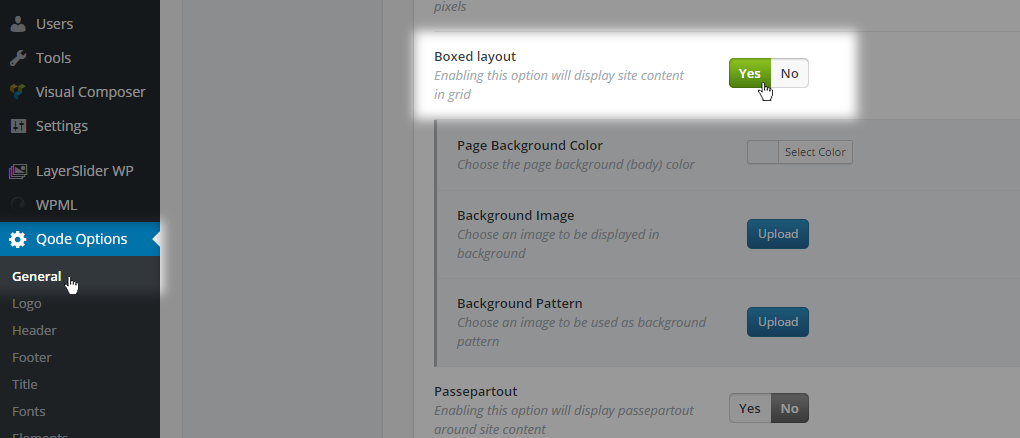
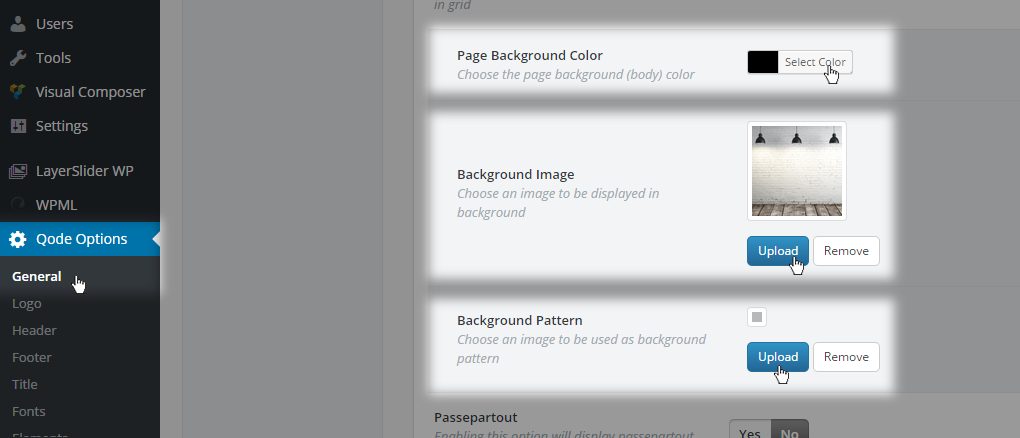
When you enable the Boxed Layout, you’ll be able to choose a background color, a background image, or a background pattern.
5.5 Smooth Scroll and Back to Top
The Smooth Scroll setting enables a smooth scrolling effect on every page that is triggered by the mouse-wheel action. This feature is disabled by default on Mac and touch devices as they include smooth scroll functionality as a native feature.
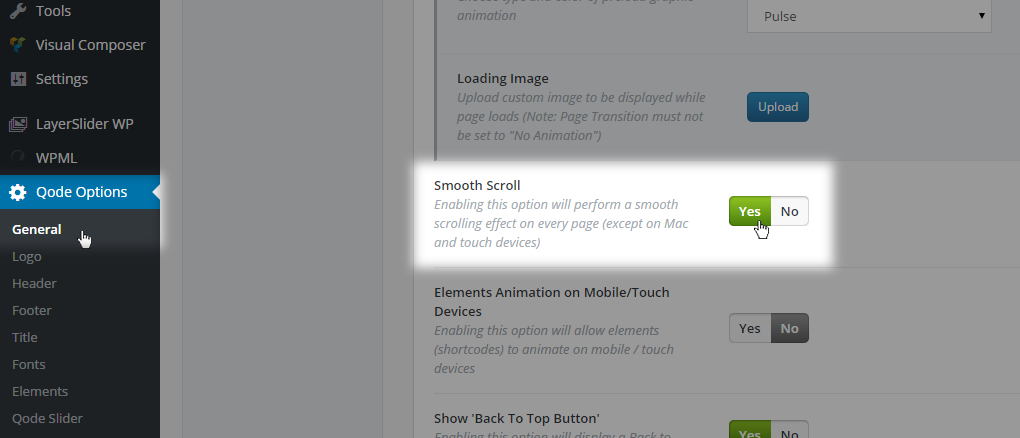
Note: The Revolution Slider plugin can cause conflicts with the Smooth Scroll feature.
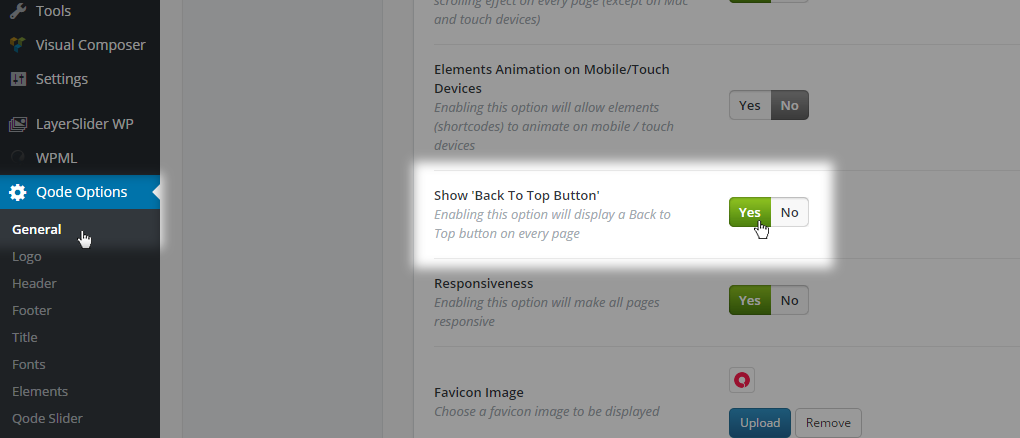
Enabling the Back to Top option will display a Back to Top button on every page letting the visitors of your website easily scroll to the very top of the page they’re currently on.
5.6 Favicon
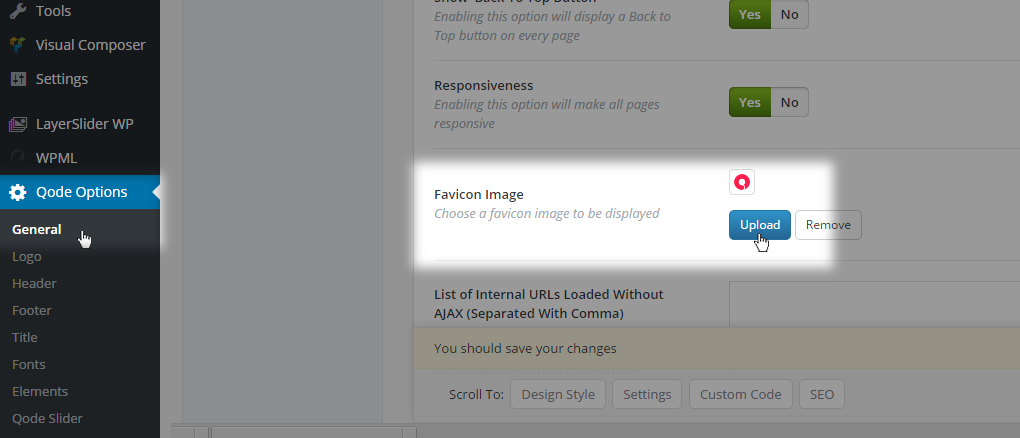
A Favicon is a small icon that appears in the upper left corner of a browser tab. To set a Favicon for your website, please go to WP Admin -> Qode Options -> General and find the Favicon Image item, and here upload your own Favicon instead of our placeholder favicon.
RELATED LINKS:
5.7 Errors and Troubleshooting
In this section we will describe the most common errors that can occur when setting up the basic styling of your website, and provide solutions for each one.
5.7.1 Writing permissions not set – Qode Options not taking effect
Problem: If writing permissions aren't set on your server for folders containing theme CSS and JS files, you will see a warning message at the top of the Qode Options page.

As a direct consequence, the Qode Options settings will not take effect on the front-end.
Solution: In order to remove this warning message, you need to change permissions for wp-content/themes/bridge/css and wp-content/themes/bridge/js folders and set them to 755 using an FTP software.
If you have any issues regarding writing permissions, please contact your hosting service provider. Alternatively, you can submit a ticket to https://helpcenter.qodeinteractive.com/hc/en-us with FTP access to your site, and our support team will have a closer look and see what they can do to help.


