If you navigate from your WP Admin dashboard to Qode Options -> Footer you can choose two main types of footer: Uncovering Footer,
9. Footer

and Regular Footer
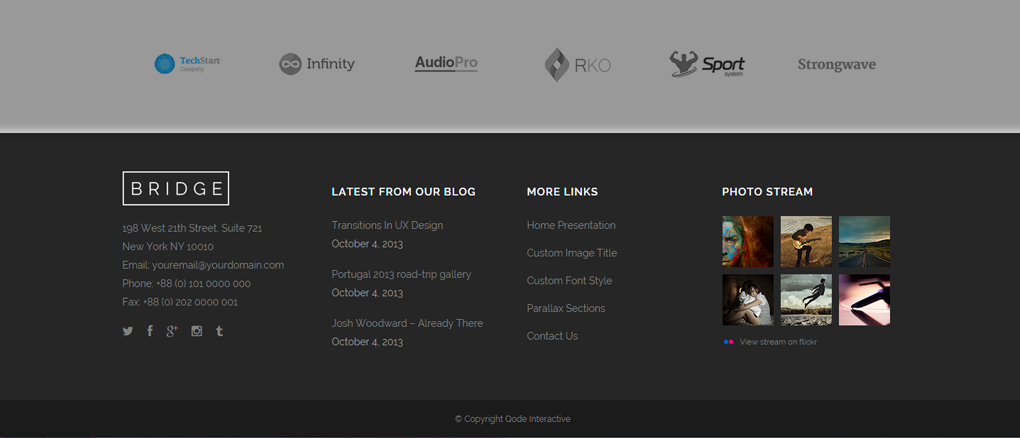
The difference between the two is that the Uncovering Footer will have the content area overlap the footer area at the bottom and produce a smooth unveiling effect. This layout is very common for a modern web design approach -
The other option is to select the Regular Footer where there is no overlapping - the footer will be shown right after the content of the page and have a stacked layout, as you can seen on the majority of websites online.
9.1 Footer Options
The Qode Options panel is where most of our theme options are set. The footer area has a dedicated tab inside the Qode Options panel as well.
9.1.1 Uncovering Footer or Regular Layout
If you navigate from your WP Admin dashboard to Qode Options -> Footer you can choose two main types of footer: Uncovering Footer,

and Regular Footer

The difference between the two is that the Uncovering Footer will have the content area overlap the footer area at the bottom and produce a smooth unveiling effect. This layout is very common for a modern web design approach -
The other option is to select the Regular Footer where there is no overlapping - the footer will be shown right after the content of the page and have a stacked layout, as you can seen on the majority of websites online.
9.1.2 Footer Background Image
Right below the Uncovering Footer option, a default background background image can be set.
This image will stretch across the whole footer area of your site.
This is a general setting that can be overridden once you get into styling Footer Top or Footer bottom area.
9.1.3 Footer Structure and Styling
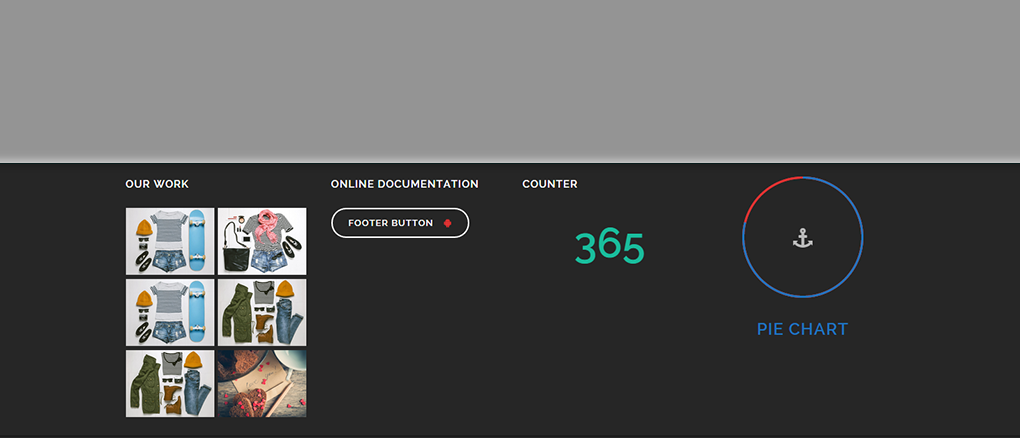
The footer area as a whole is divided into two main sections - Footer Top and Footer Bottom,
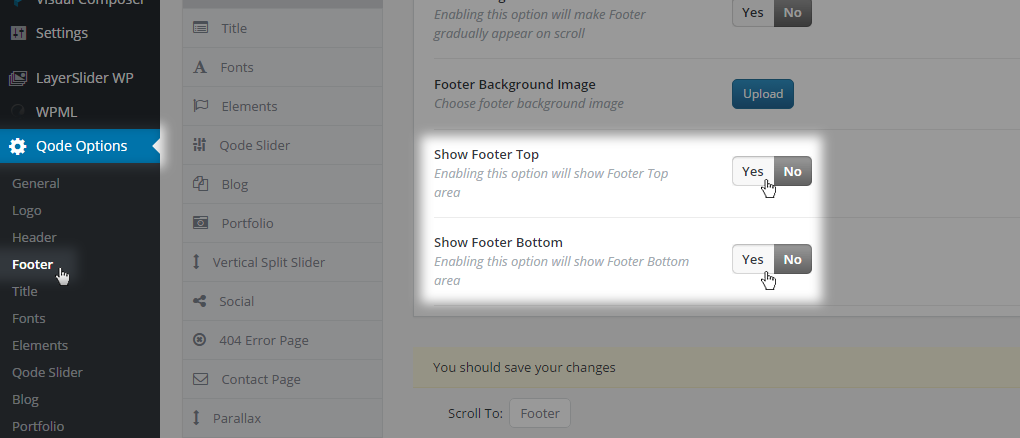
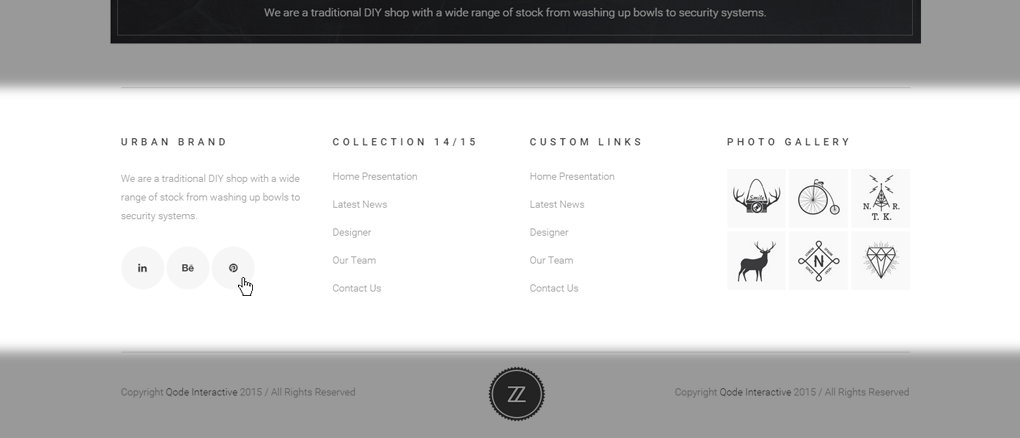
Example with only Footer Top area - http://demo.qodeinteractive.com/bridge38/
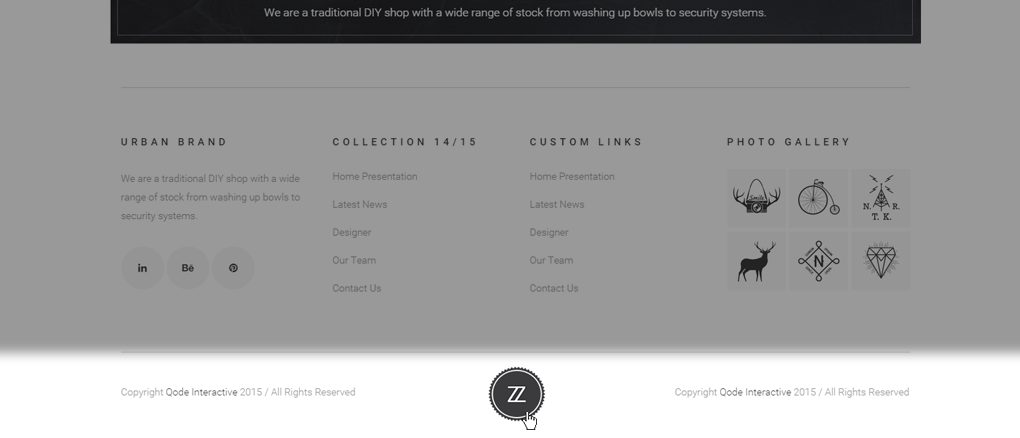
Example with Footer Top area and Footer Bottom area – http://demo.qodeinteractive.com/bridge59/
If you do not enable either of these footer areas, your footer will be hidden. By enabling one of these areas, a lot of new options become available -
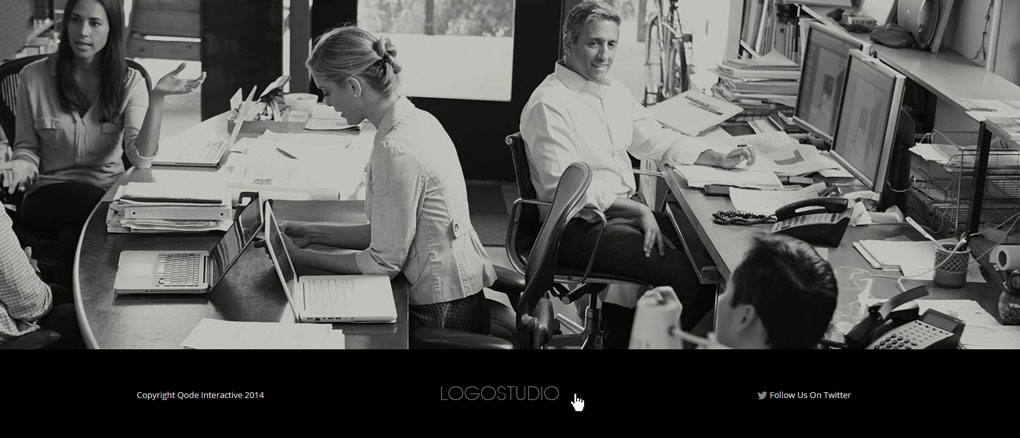
Similarly to the global website layout, both footer sections - Footer Top and Footer Bottom - can be placed in grid as well-
or set to stay in full width -
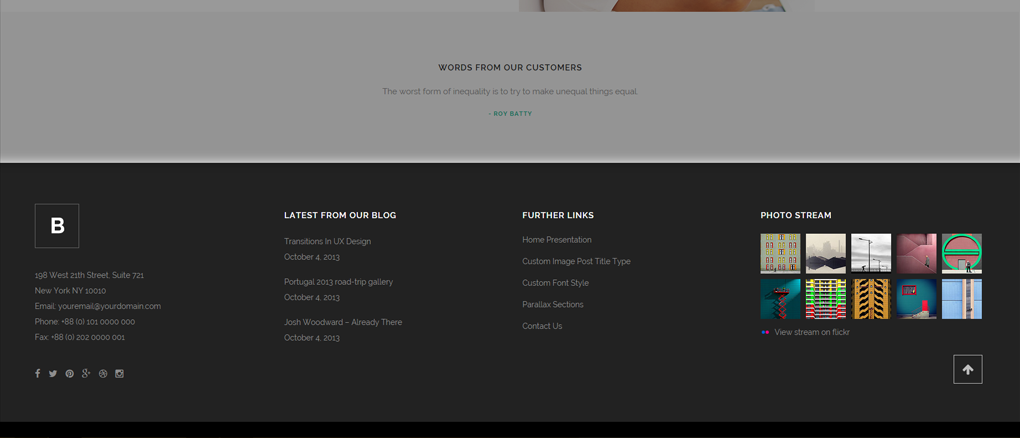
This is defined using the Footer In Grid option
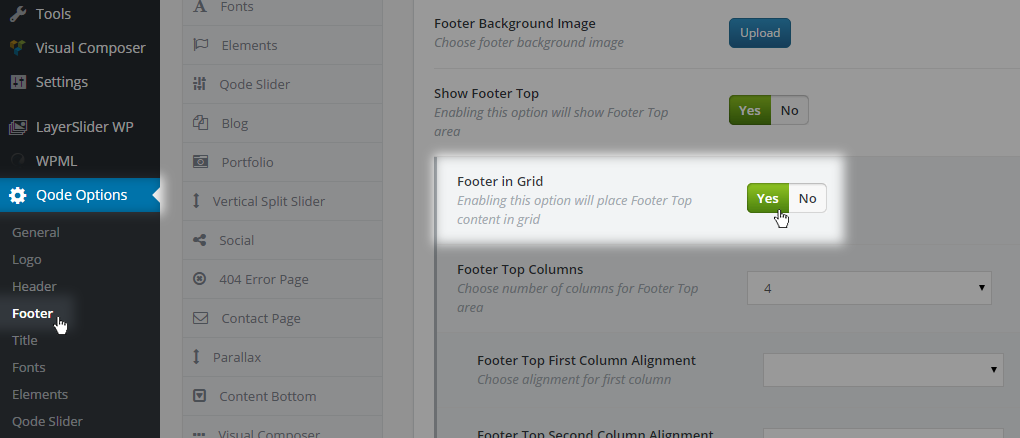
The basis of footer structure represents a grid column layout. This layout technique lets you build your content through widget areas and have them positioned in a clear and responsive manner.
Let’s focus on Footer Top for now.
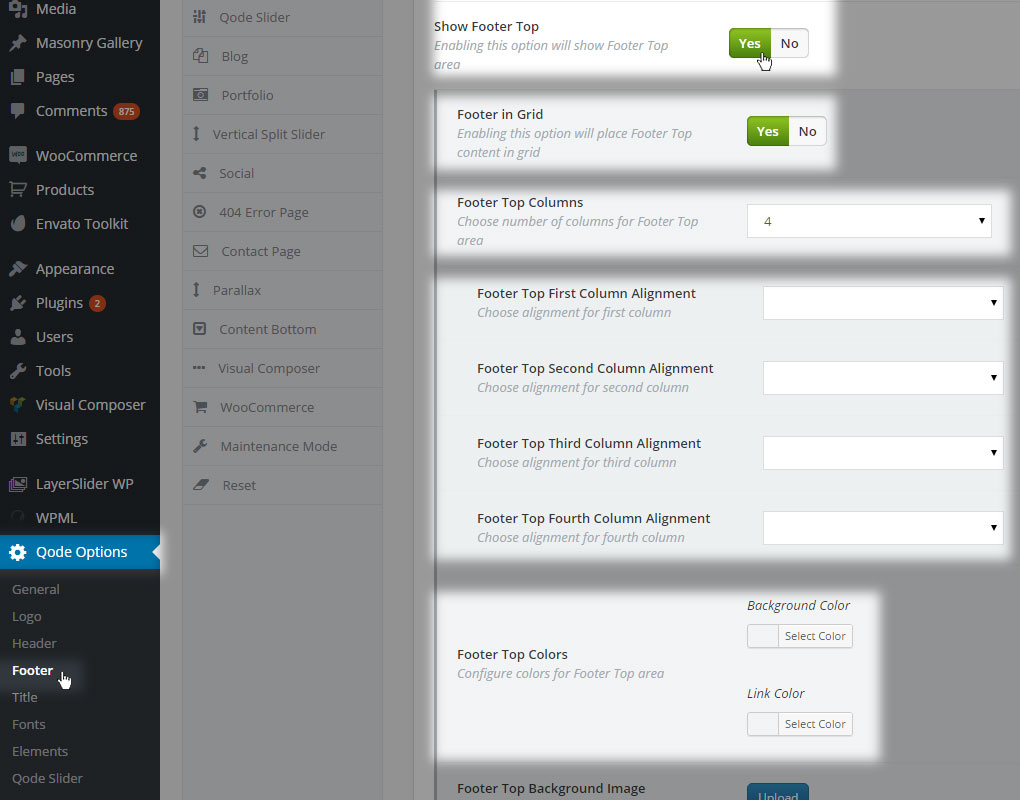
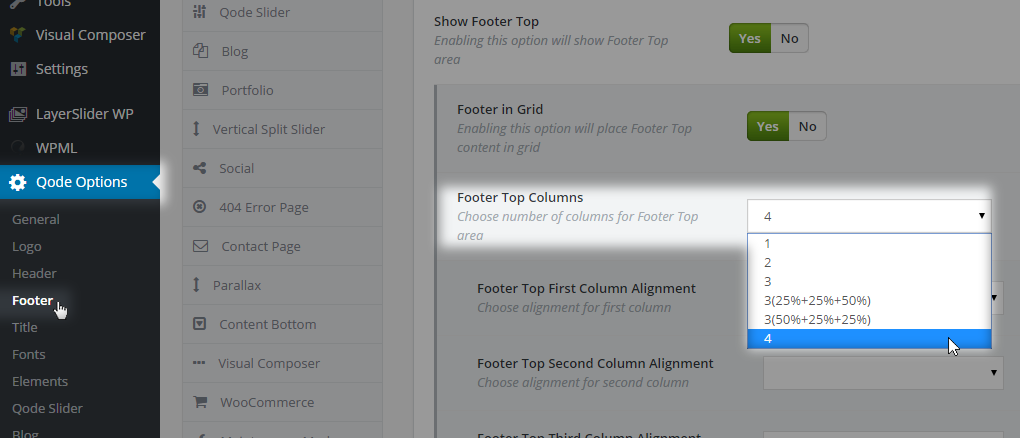
In Qode Options -> Footer you have an option to choose how many columns you want to set as your layout structure. The range goes from one to four columns, in various alignments
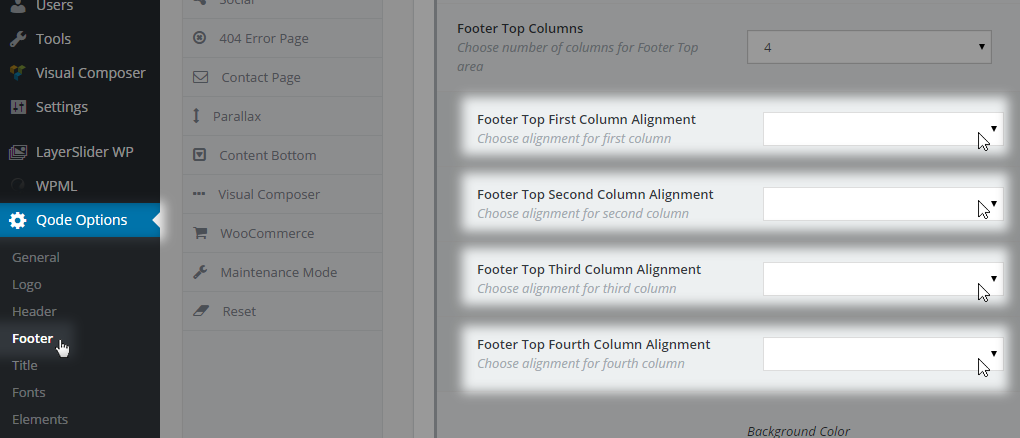
By selecting the number of columns, the alignment options will appear below.
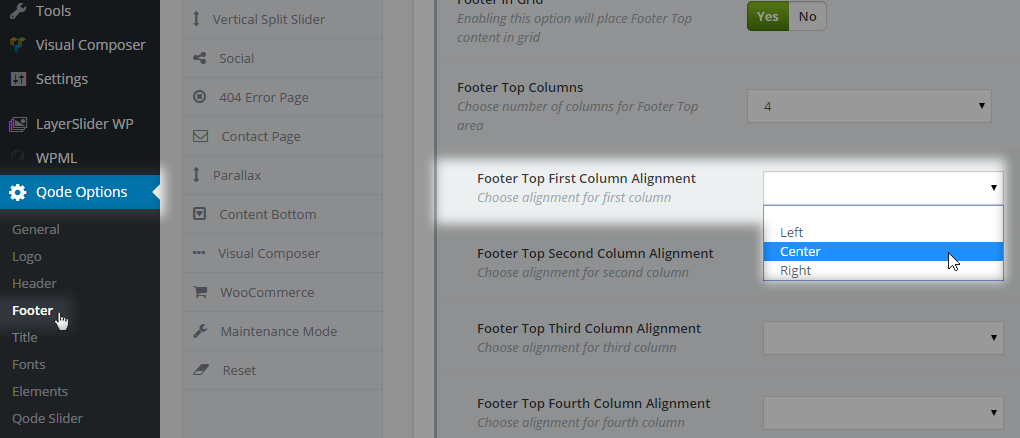
Colors and Background Image properties for this area will override any general setting you might have applied to the Footer Background Image initially.
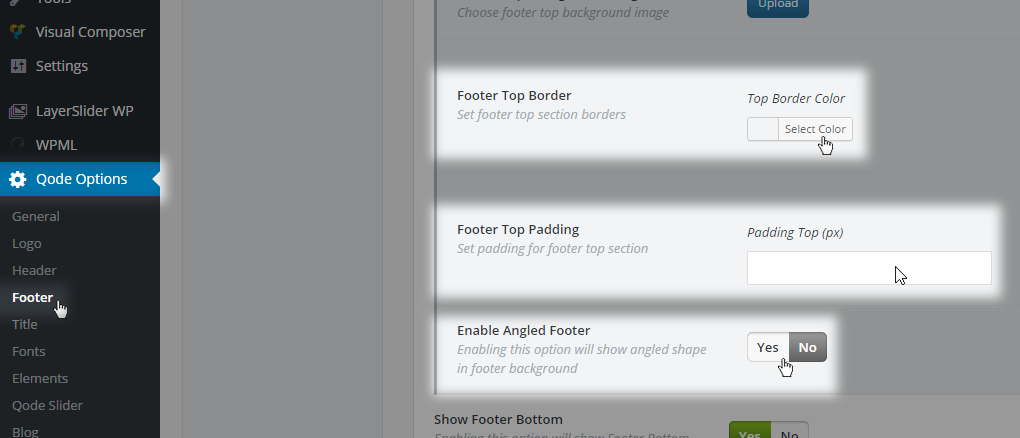
Other layout options that are valuable in terms of styling and design are padding, border and angled footer
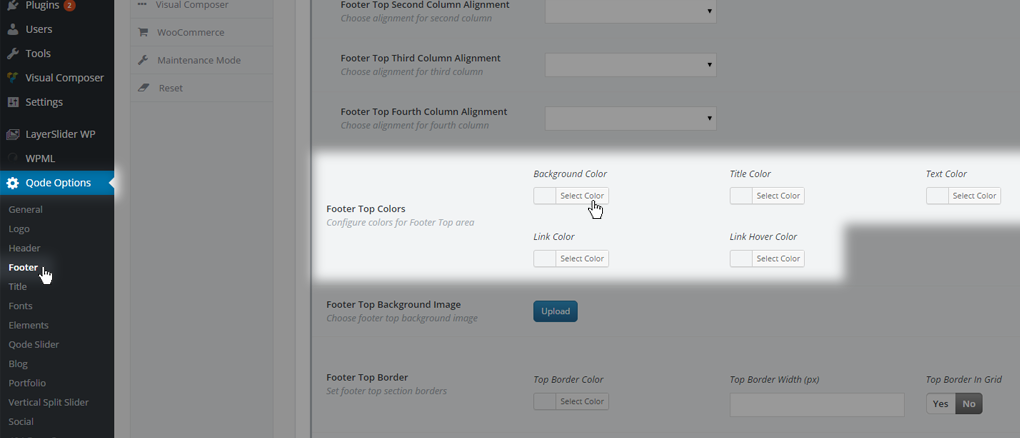
Let’s go through these additional styling options:
Footer Top Colors - With this option you can configure colors for the Footer Top area with Background Color, Title Color, Text Color, Link Color, Link Hover Color -
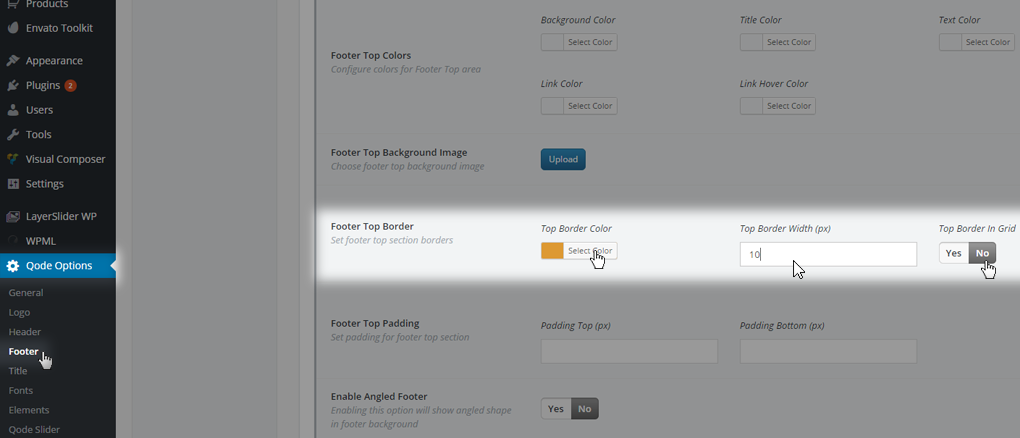
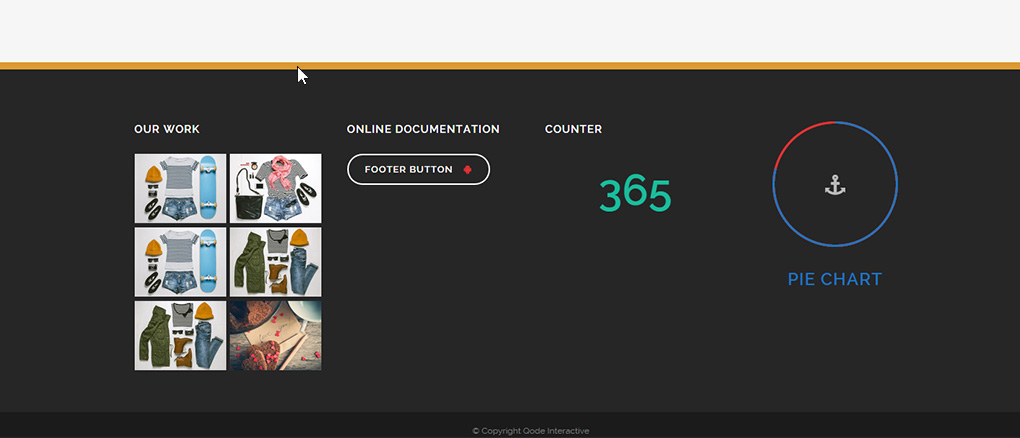
Footer Top Border - Setting the Footer Top Border option, you can separate the Footer Top area from the content above and set the separator color. Also you can set the height of the footer area, and if you have the footer in grid you might want to check the option for Top Border in Grid as well.
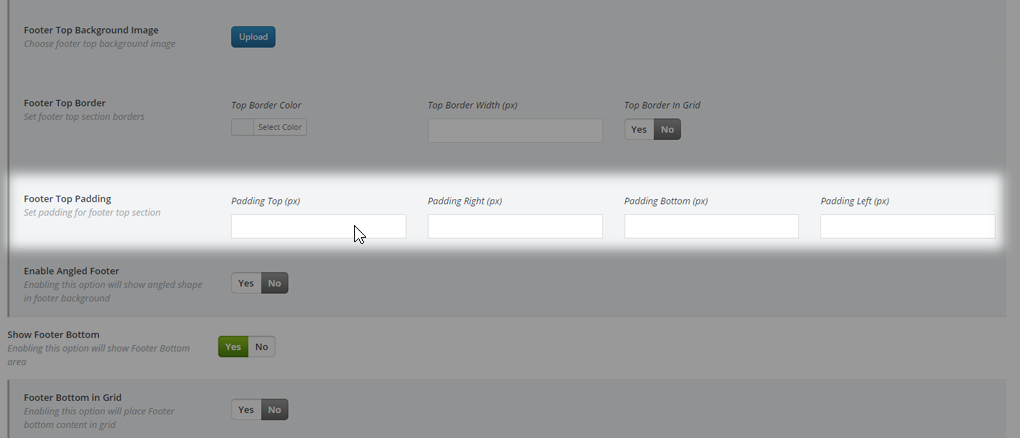
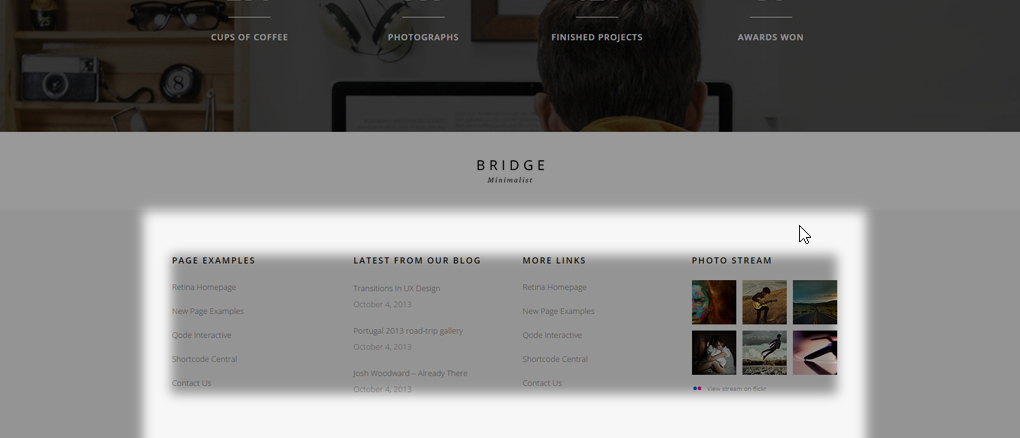
Footer Top Padding - With Footer Top Padding you can set all four paddings: Top, Right, Bottom and Left. This way, by managing Top and Bottom values you can set the height your footer area will inherit.
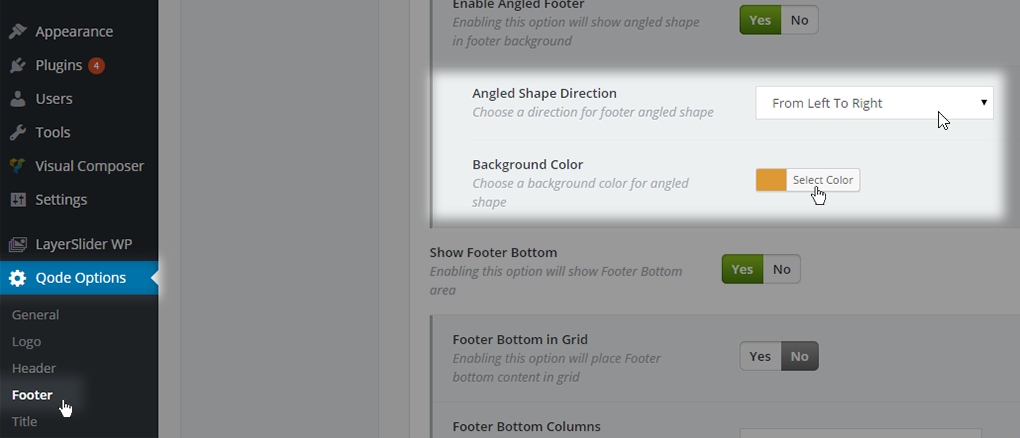
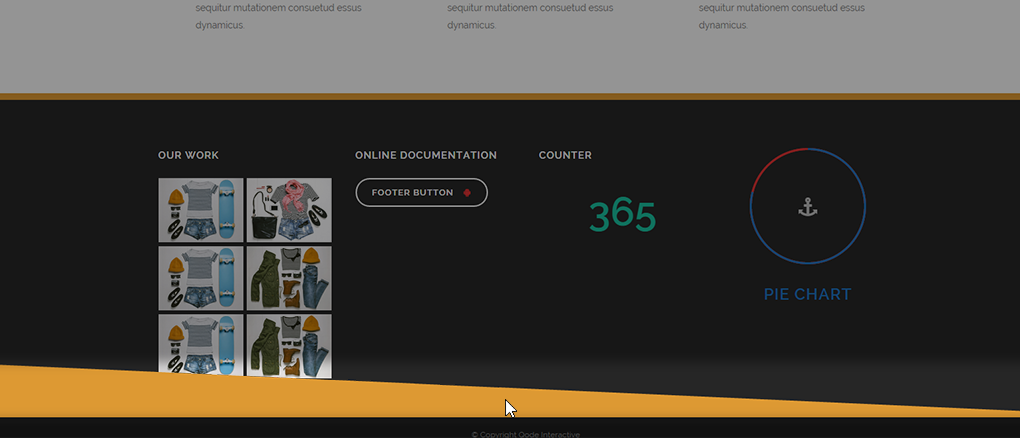
Angled Shape, Angled Shape Direction - Using this option you can create an angled footer and set its direction and background color.
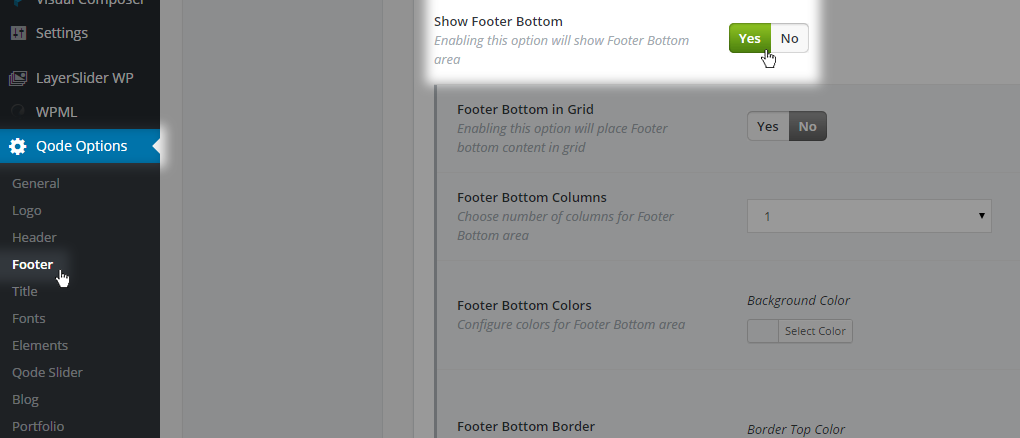

Similar settings are available if you decide to enable the Footer Bottom area -

An additional option for Footer Bottom Columns lets you choose three columns maximum. Also, you can use Custom Menu Item Spacing. This option is set to adjust the spacing between menu items located in the custom menu widget.
9.2 Widgets
To add content to your footer please navigate to WP Admin -> Appearance -> Widgets. This is where all your footer widget areas (sidebars) are located. To add content to one of these areas you need to ‘drag & drop’ a widget from your left-hand side.
Many engaging footer layouts on our demos use WPBakery shortcodes placed directly into a Text Widget in one of the footer widget areas. We’ll go more in-depth on how to create some of them in the following sections.
9.2.1 Social Icons
If you are looking to create a social icons area in your footer,
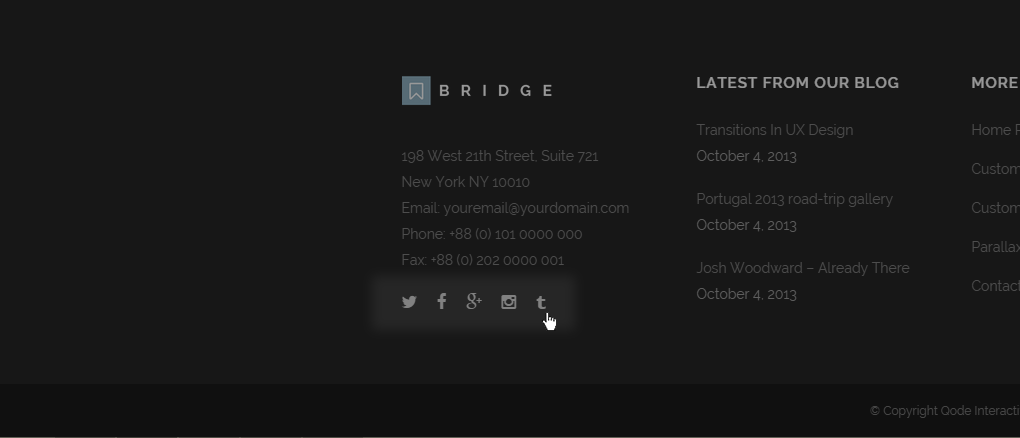
you should follow these instructions:
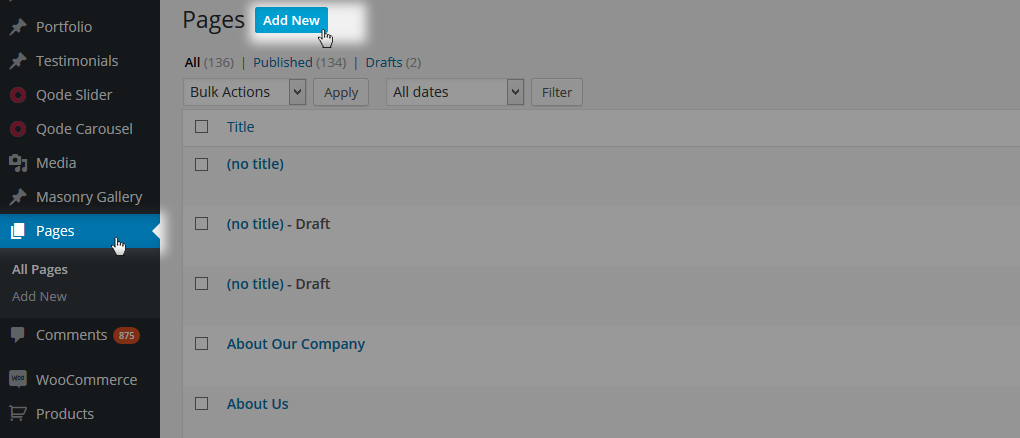
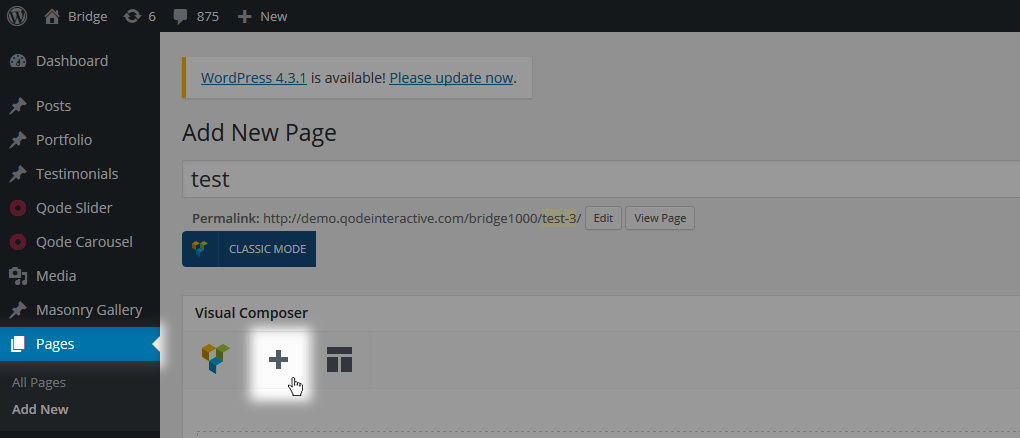
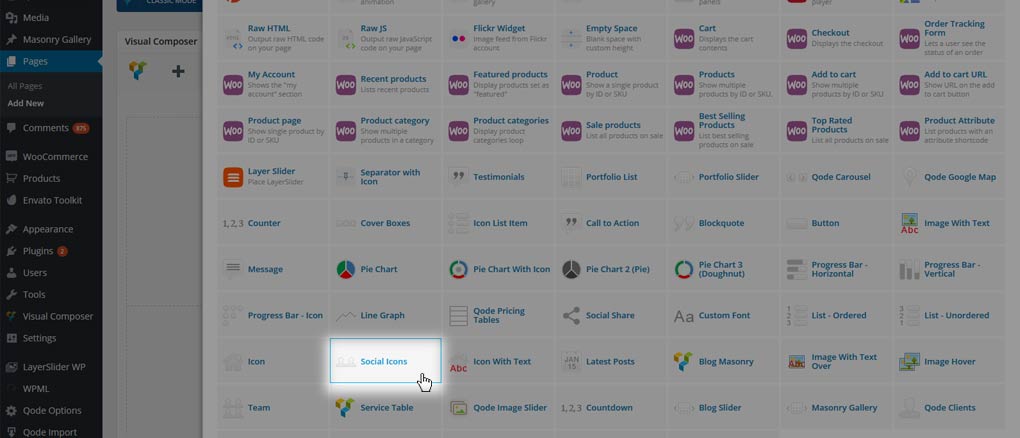
First, navigate to WP Admin -> Pages and create a test page. Then switch to backend editor, add a Social icons shortcode and set desired parameters,
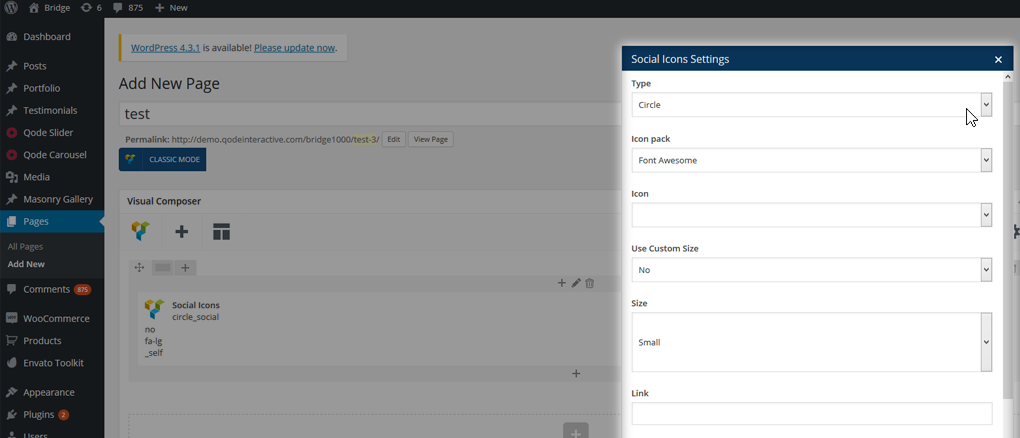
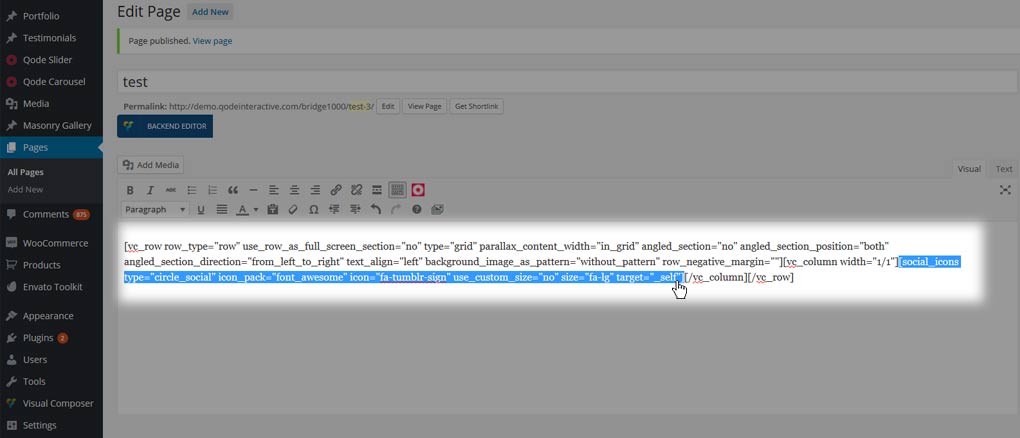
Now, switch to classic mode and copy the code of shortcode,
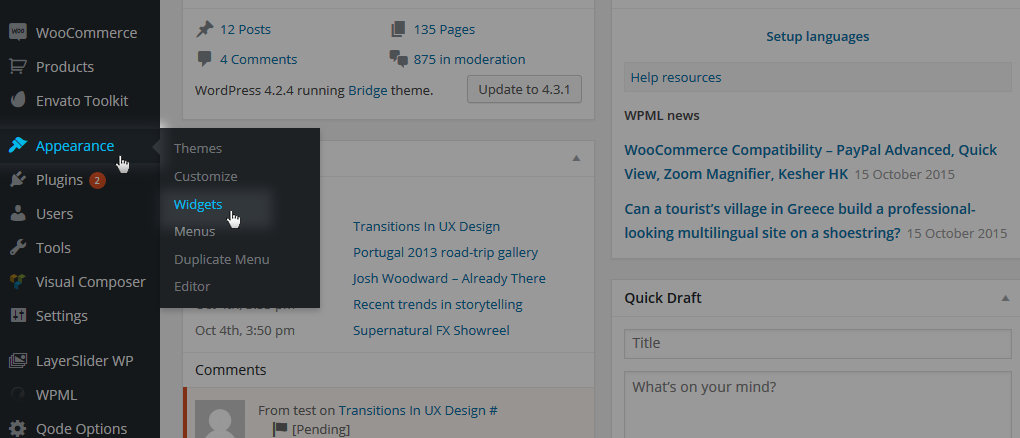
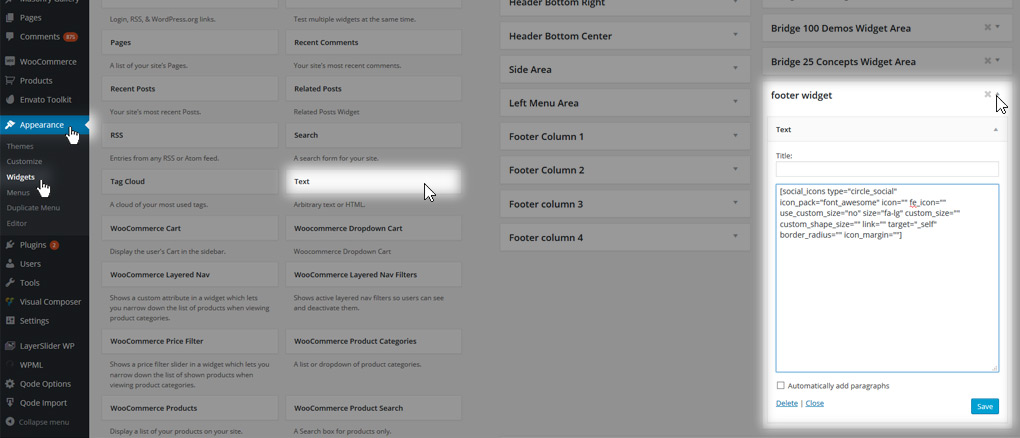
In the end, navigate to WP Admin -> Appearance -> Widgets and paste the shortcode in a Text widget -
9.2.2 Logo and Other Images
In order to change the logo image placed in the footer area

you should navigate to WP Admin -> Appearance -> Widgets, open the Footer Column widget area the logo is set in, open the Text Widget in that widget area, and replace the HTML tag’s src attribute. Add the link to your own image -

Similarly to placing your original logo you can add another image as well.
If you don’t want to use any image in your footer, and when you delete the text widget, the footer gets misaligned,
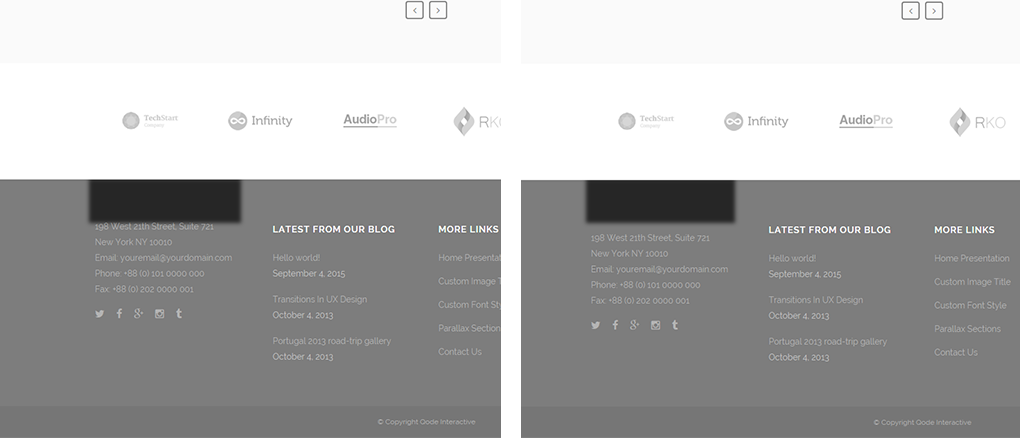
you should navigate to Qode Options -> General -> Custom code -> Custom CSS field and delete this code:
footer .column1 {
position: relative;
top: -18px;
}
Here is a screenshot:

9.2.3 Flickr Stream
In order to put a Flickr stream in your footer,
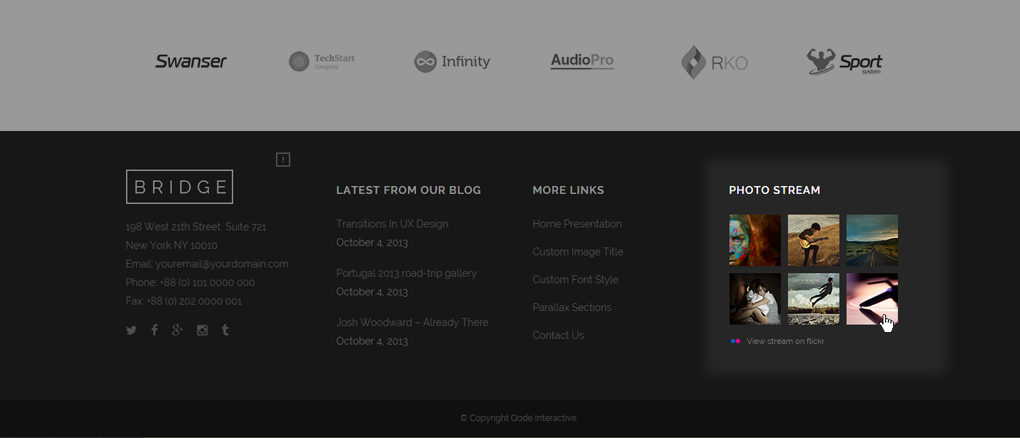
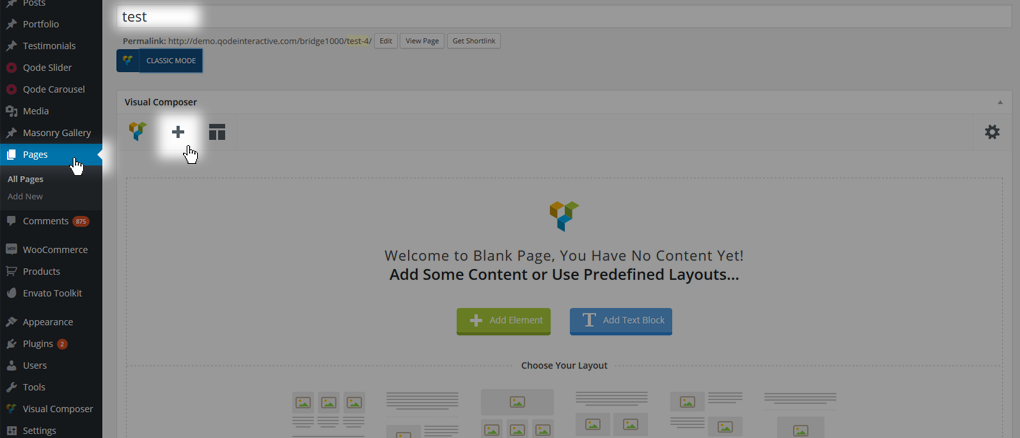
you should go to WP Admin -> Pages -> Create New Page and use this test page to add the Flickr shortcode,
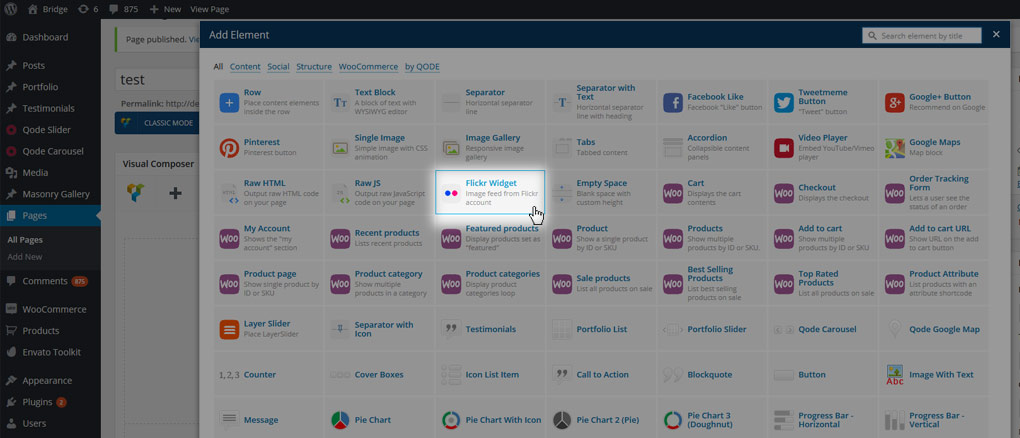
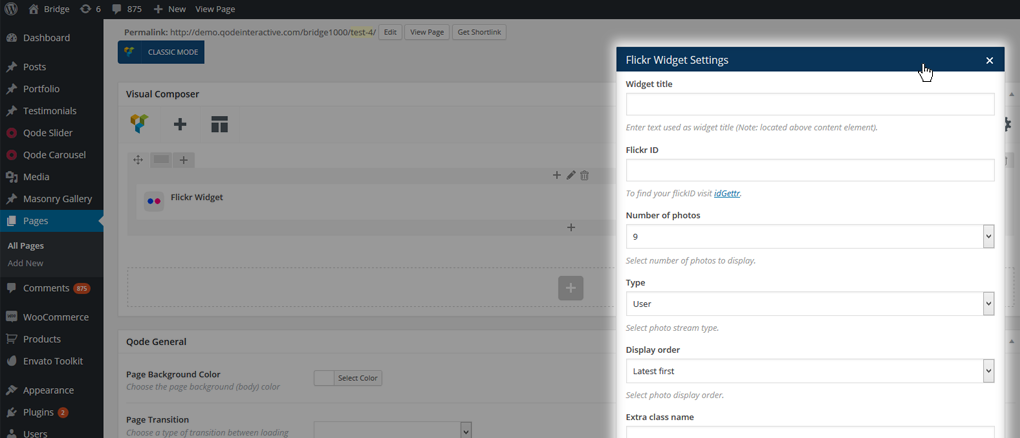
Then you should switch WPBakery back to Classic mode and you will get the shortcode which you need to copy from the page,
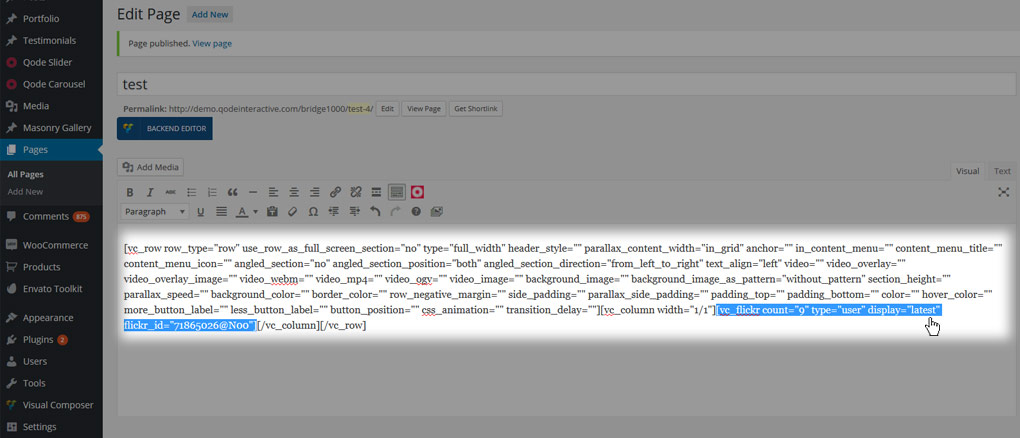
Then navigate to WP Admin -> Appearance -> Widgets -> Footer, add a Text widget into a Widget Area and paste your Flicker shortcode there and save,
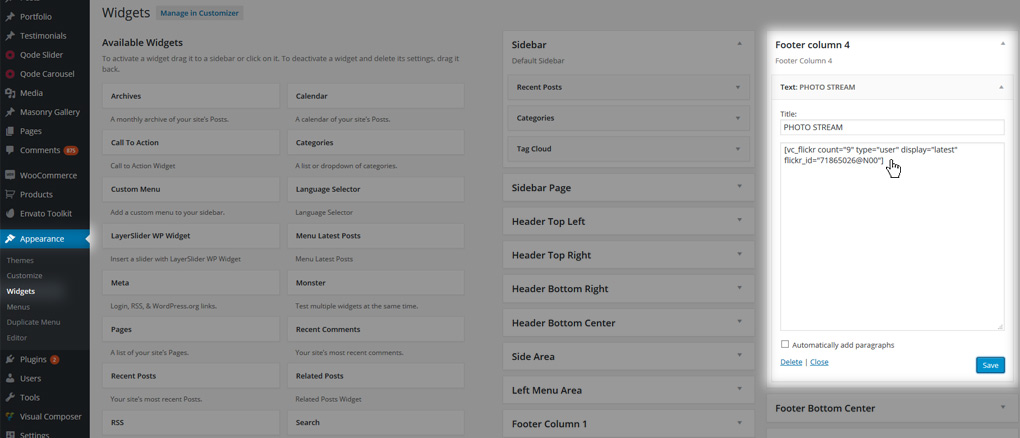
9.2.4 Image Gallery
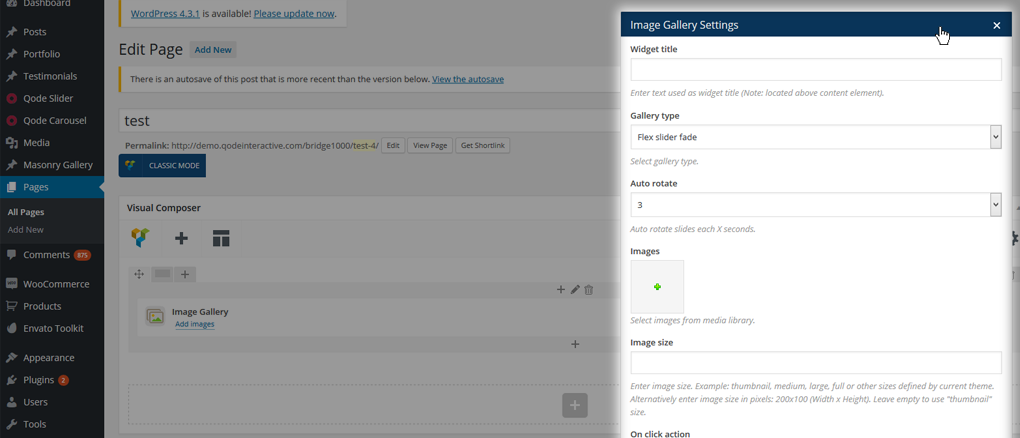
Similar to adding Flickr Stream to your Footer widgets, you can add an Image Gallery shortcode into your site’s footer area as well. First, create an Image Gallery shortcode on a test page,
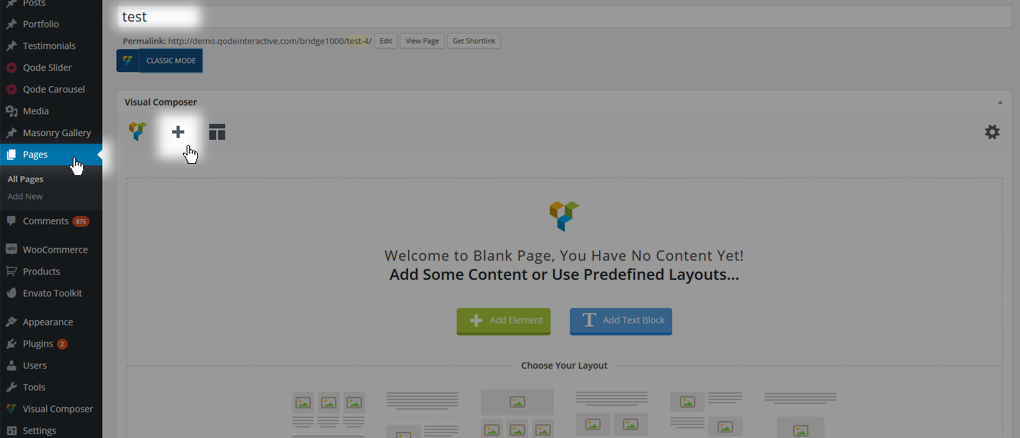
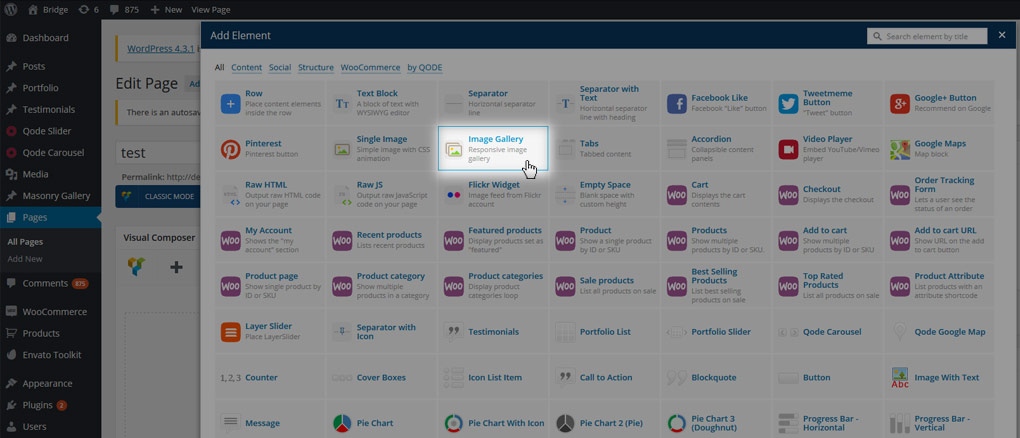
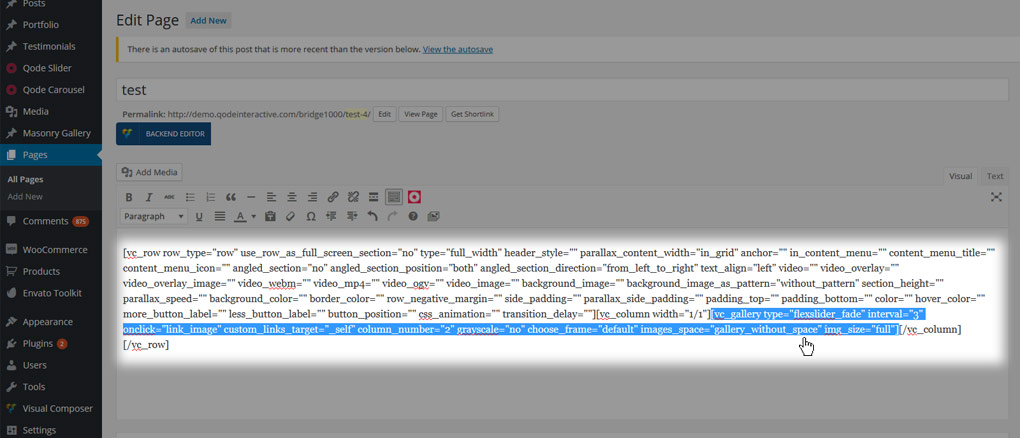
switch back to Classic mode, select the gallery shortcode,
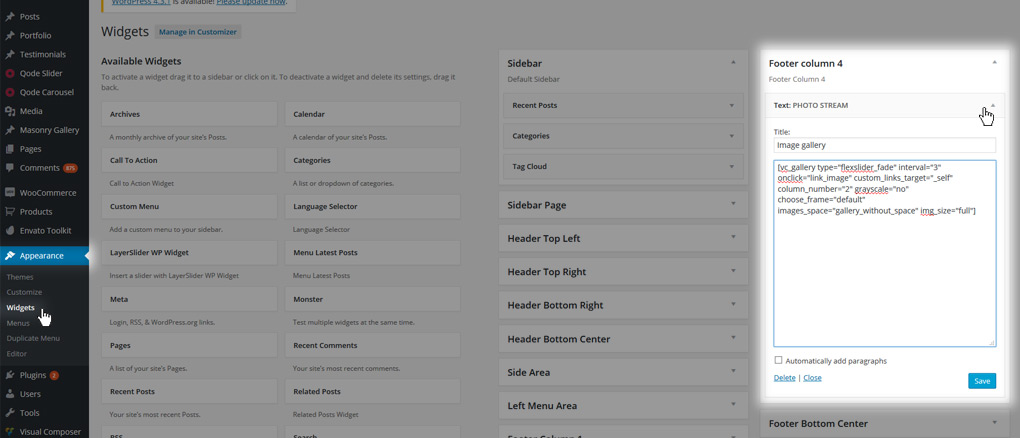
copy and paste that shortcode into your Text widget in Appearance -> Widgets -> a widget area of your choice,
9.2.5 Phone and Address Links
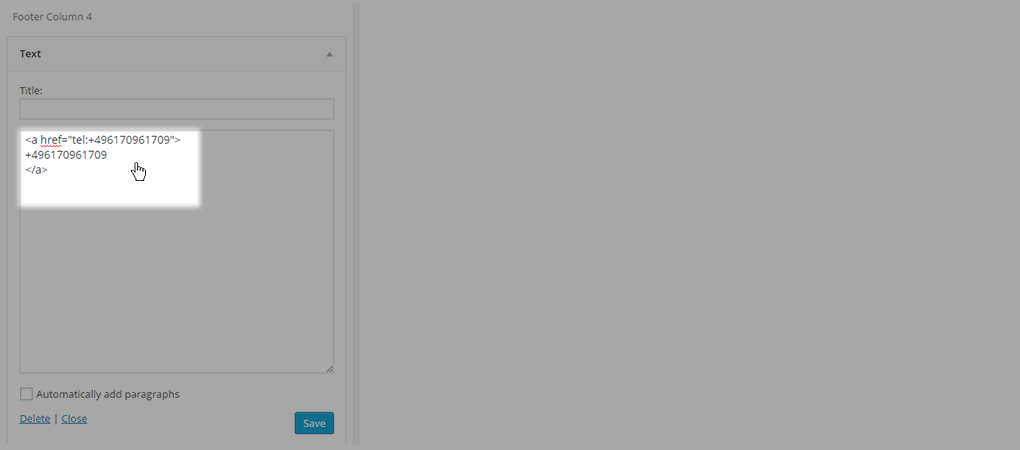
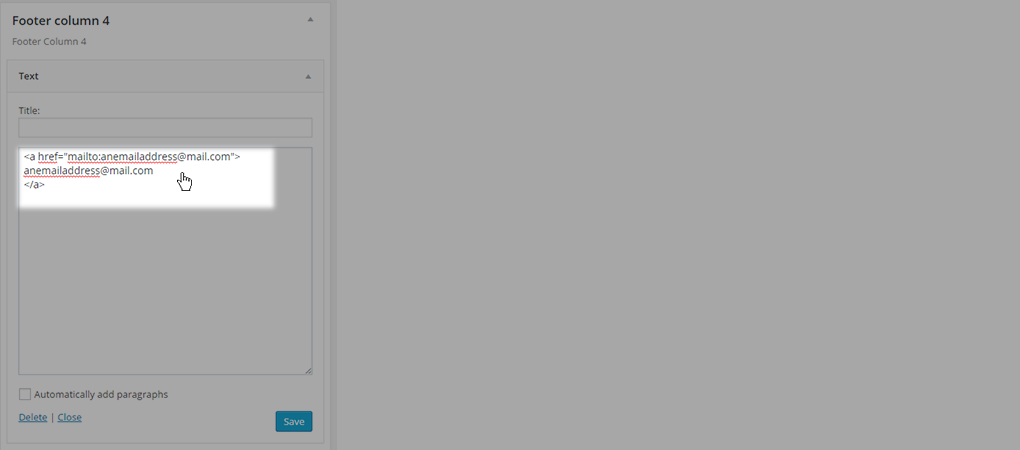
If you’ve already added Phone and/or Email address in the footer as simple text and want that to become a link-able element

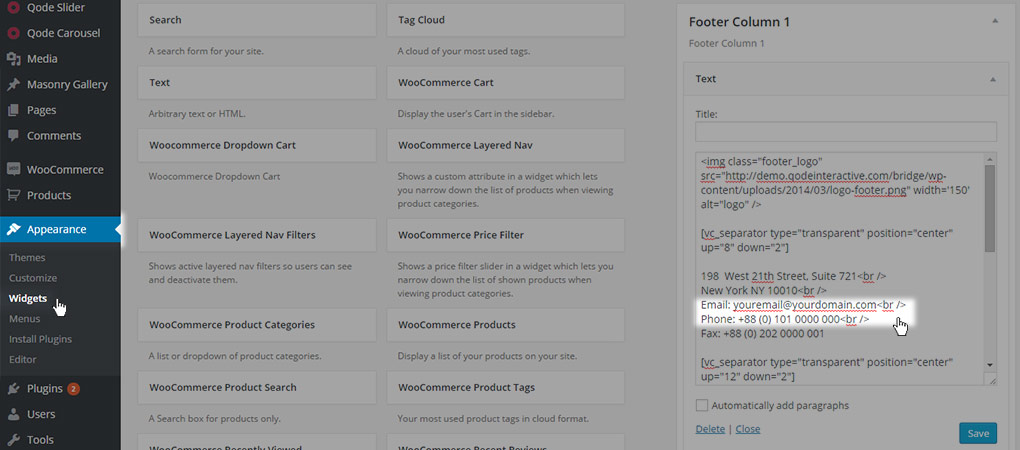
please navigate to WP Admin -> Appearance -> Widgets and in the part of the Footer area in which you have this information create HTML anchor tags,
As a result, links will be displayed on the front-end,

9.2.6 Copyright Note
In order to set a copyright note at the bottom of your site,
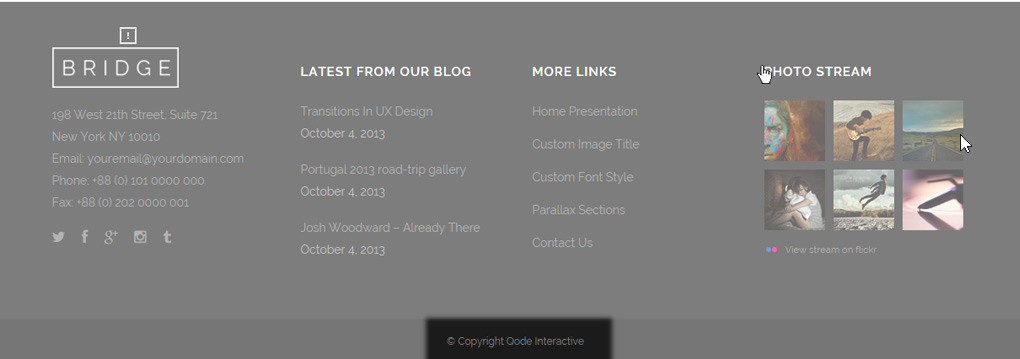
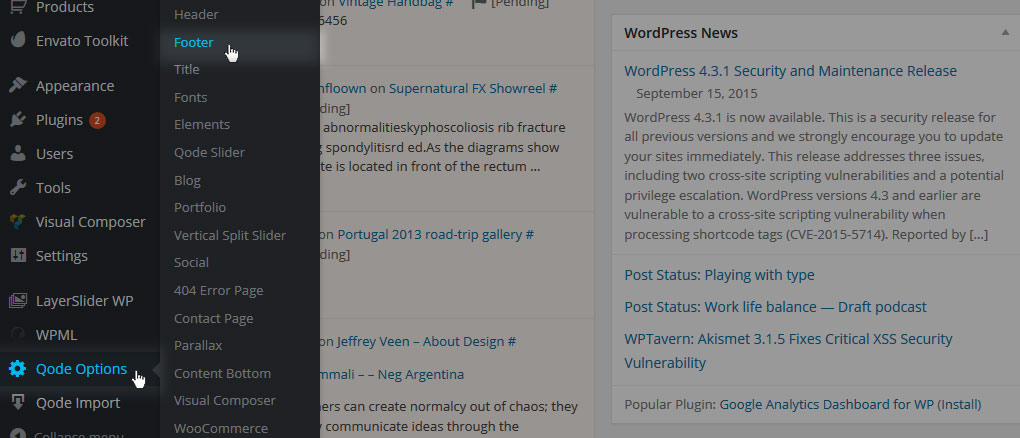
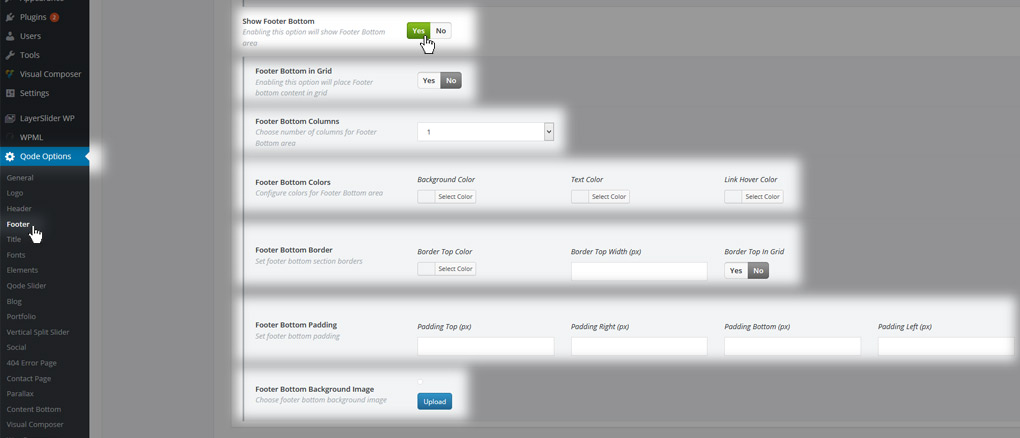
first, you should check if the footer bottom is enabled in WP Admin -> Qode Options -> Footer -> Show Footer Bottom.
To add a widget into the footer bottom area, navigate to WP Admin -> Appearance -> Widgets and find the Footer Bottom Center widget area for example,
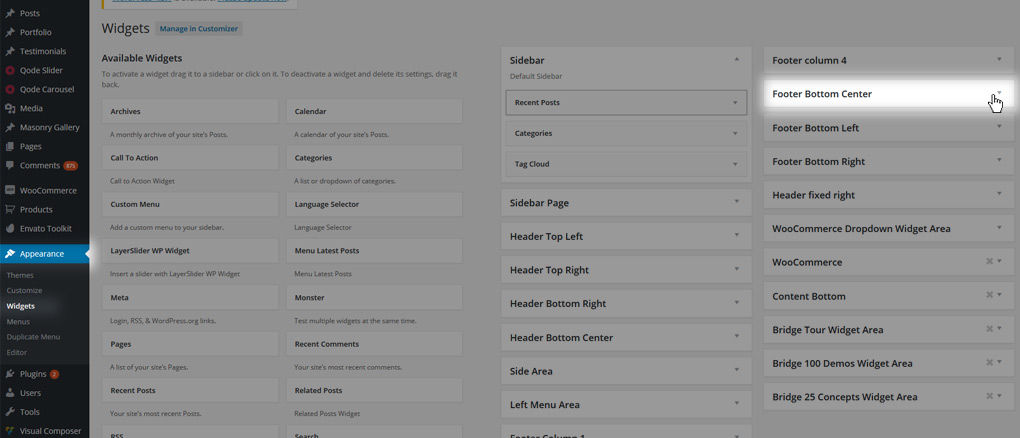
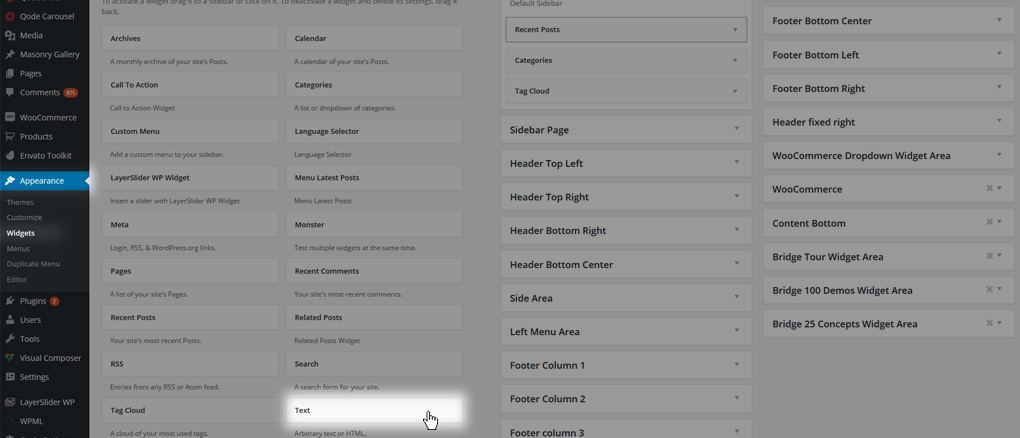
Add a Text widget to Footer Bottom Center widget area,
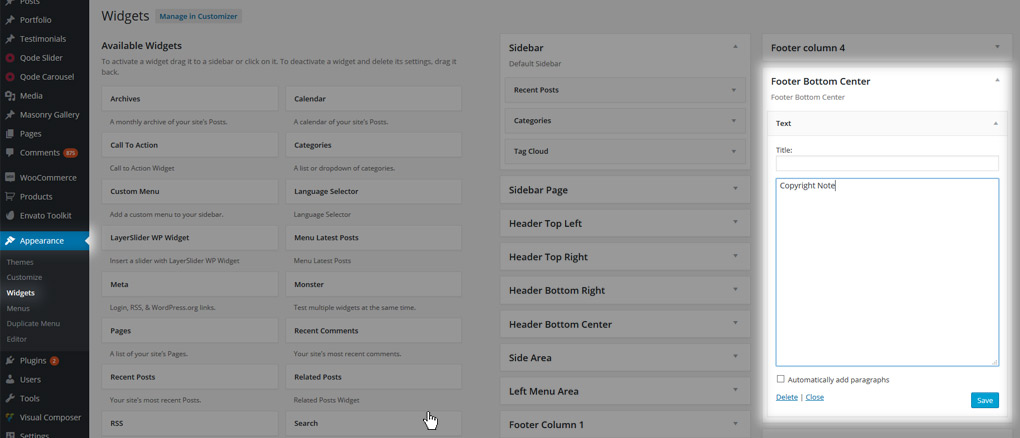
Insert your text into the content field,
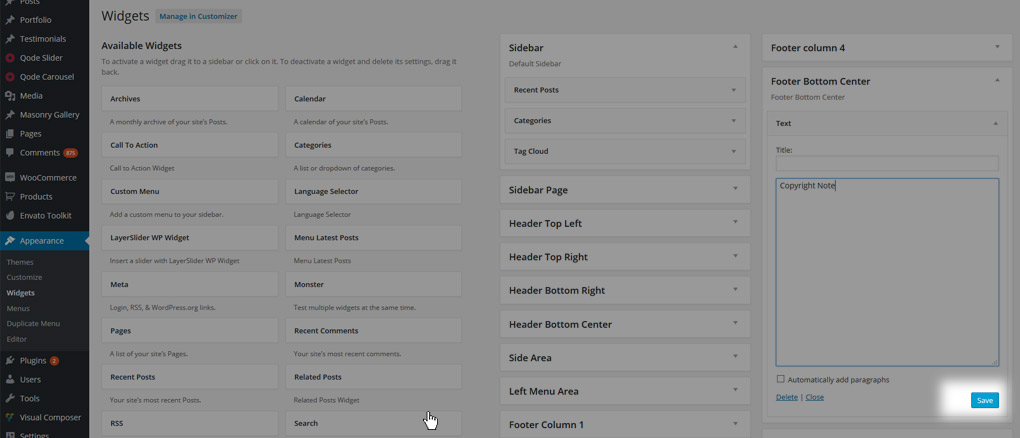
Save and refresh your site,
To change this widget’s style, navigate to WP Admin -> Qode Options -> Footer -> Footer Bottom,
9.2.7 Contact and Newsletter fields
Depending on the purpose of your website it might be useful to have newsletter subscription field available for your site visitors throughout the site. One of the more convenient locations is usually a widget are in the footer as it’d be present on each page a site visitor navigates to.
To add a newsletter subscription field to a footer widget area, first you need to install Contact Form 7 plugin. Then, create a subscription form that will consist of Name, Email and a Subscribe button for example -
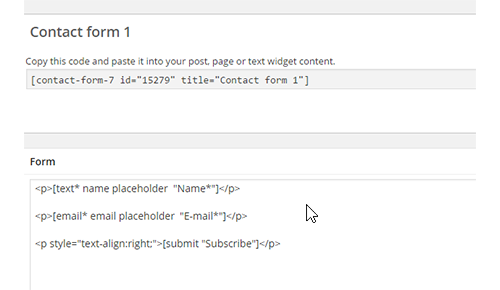
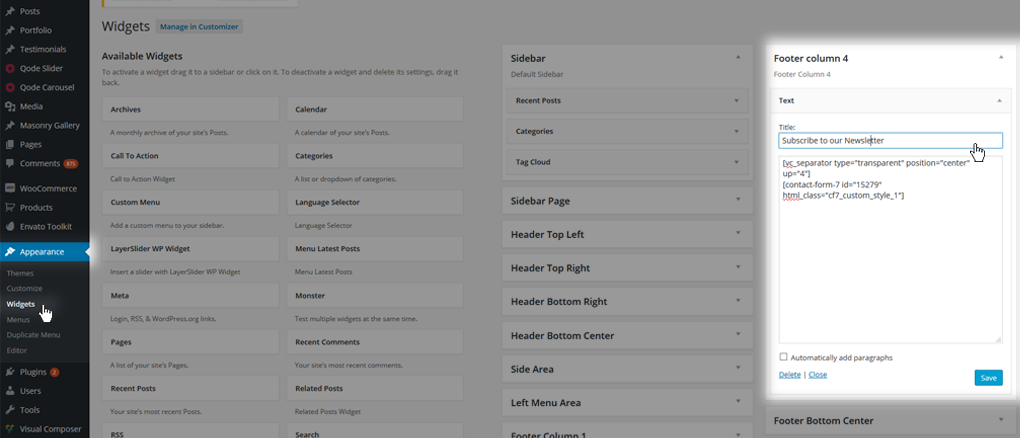
Finally, place its shortcode into the widget area of your choice in the following format:
[contact-form-7 id="15279" html_class="cf7_custom_style_1"]
Html_class determines a previously determined style in WP Admin -> Contact Form 7 to be bound to this particular form.
Here’s how this field looks like on one of our demos:
Note: As with any other shortcodes you can use additional ‘styling’ shortcodes to introduce spacing. For example:
9.2.8 Native WordPress Widgets
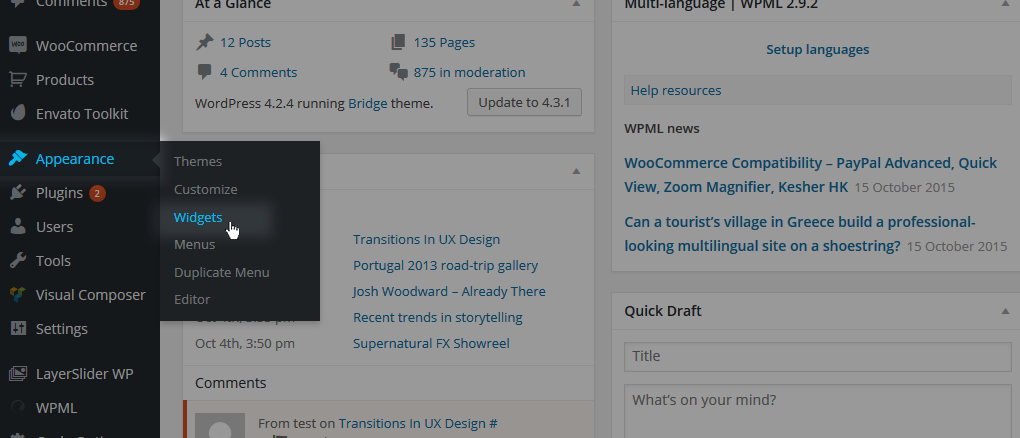
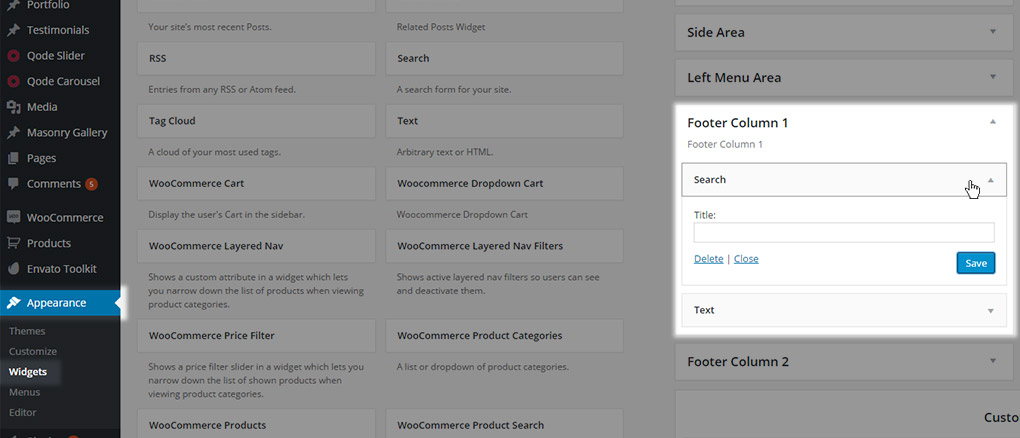
In order to add the WordPress search box into the footer area, please navigate to WP Admin -> Appearance -> Widgets ,
Add the Search widget into one of footer widget areas (Footer Column 1 - Footer Column 4),
Save and refresh your site,
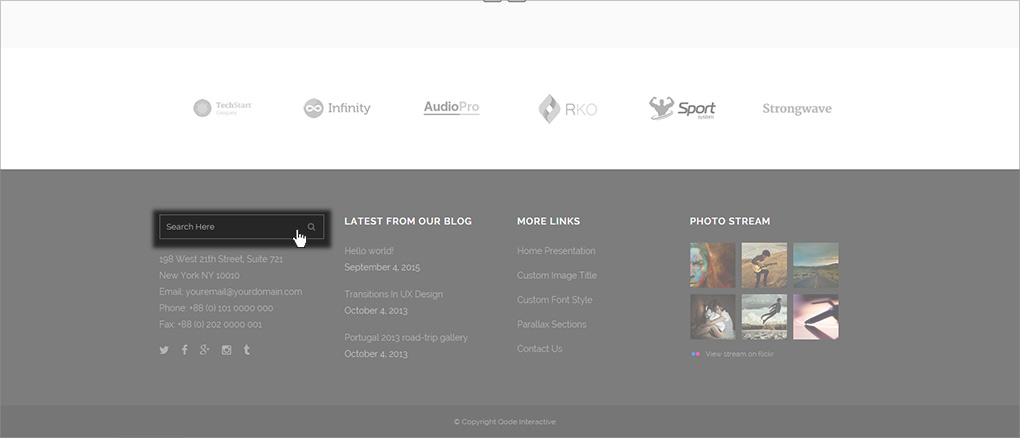
You are able to use any native WordPress widget on your website with the Bridge theme. You just need to drag a widget item into your desired widget area and tweak additional settings.
9.2.9 Adding Other Shortcodes
The method for adding any shortcode into a widget area is the same:
1. Create a test page
2. Using WPBakery add the shortcode.
3. Switch back to Classic mode
4. Copy the whole shortcode and paste it into a Text Widget
9.2.9.1 Testimonials
If you decide to place testimonials in the footer of your site, you should perform the following steps:
Navigate to WP Admin -> Pages and create a test page.
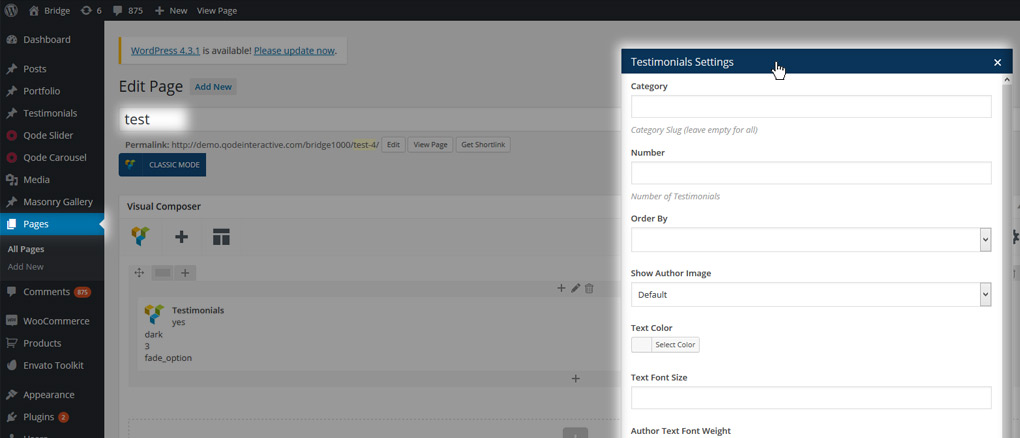
Switch to Backend editor, add Testimonials shortcode, set desired parameters and save,
Finally, switch back to Classic mode, copy the code for testimonials,
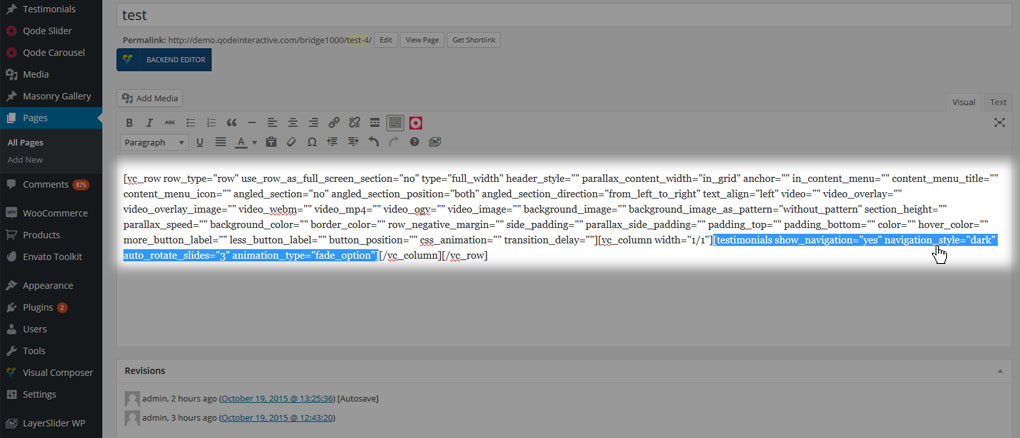
and paste it into Text widget in WP Admin -> Appearance -> Widgets,
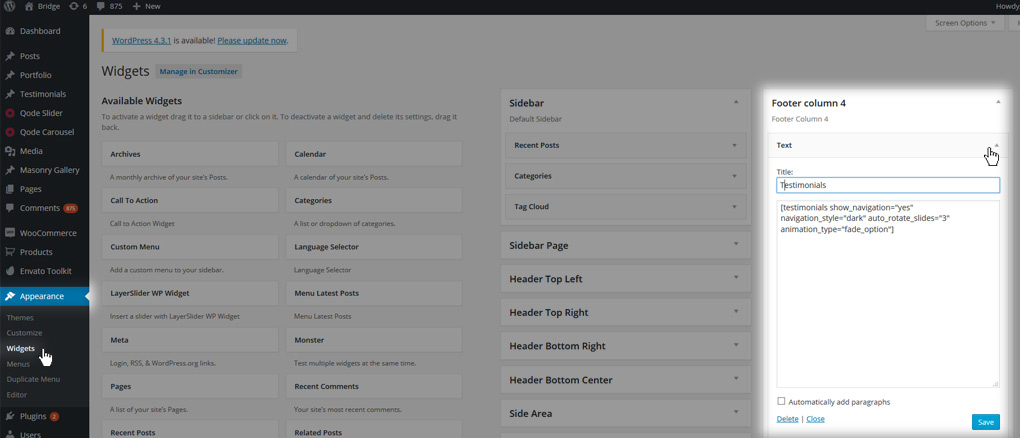
9.2.9.2 Separators
In order to introduce vertical spacing between two items in the footer widget areas we recommend using Separator shortcode. To create a separator for this usage, you should go to a test page. Using WPBakery add the Separator shortcode,
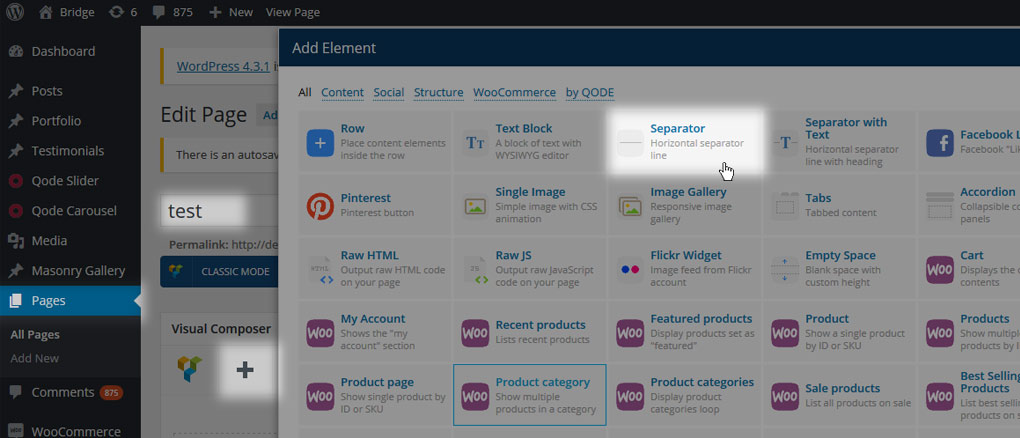
You are able to choose between solid, transparent and small separator, and set thickness and margins for your separator,
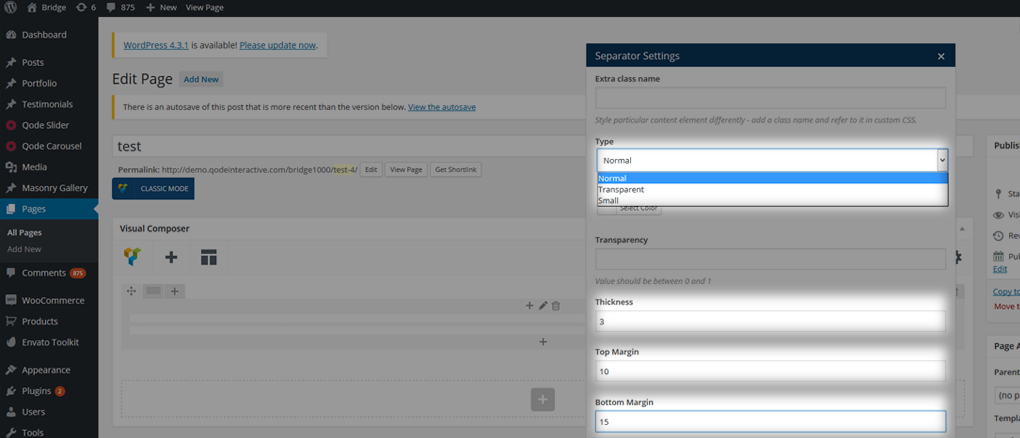
save changes, switch to Classic mode and copy code for separator,
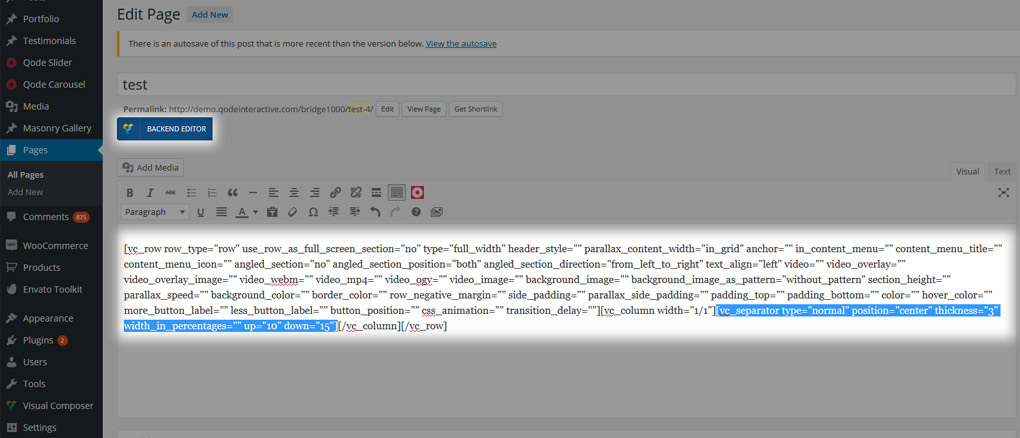
Then navigate to WP Admin -> Appearance -> Widgets and paste the code in a Text widget in the footer column of your choice,
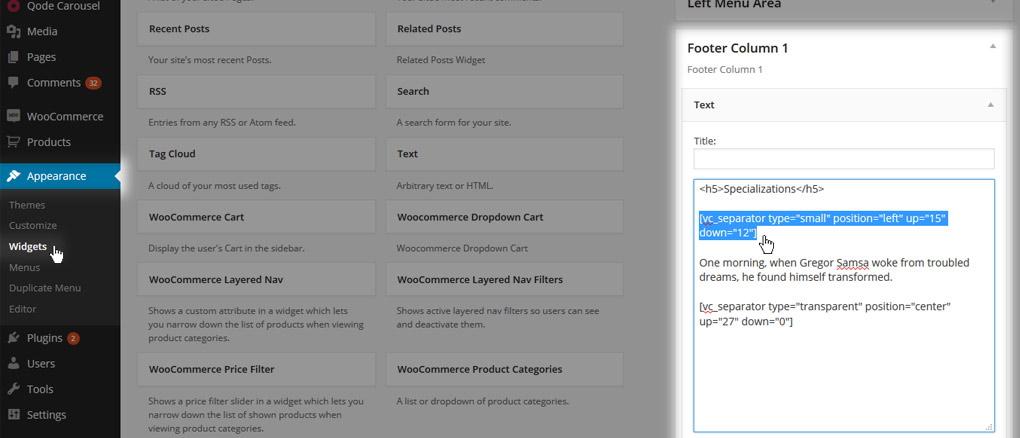
You will get this effect,
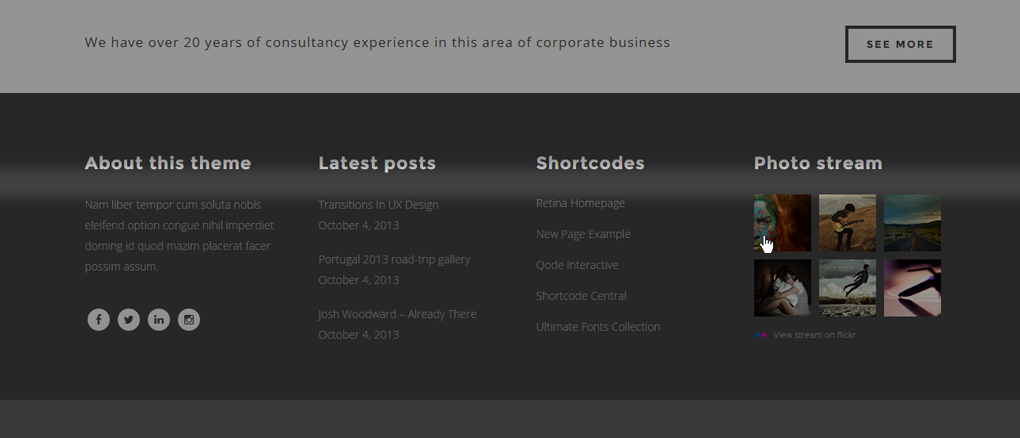
for transparent separator,
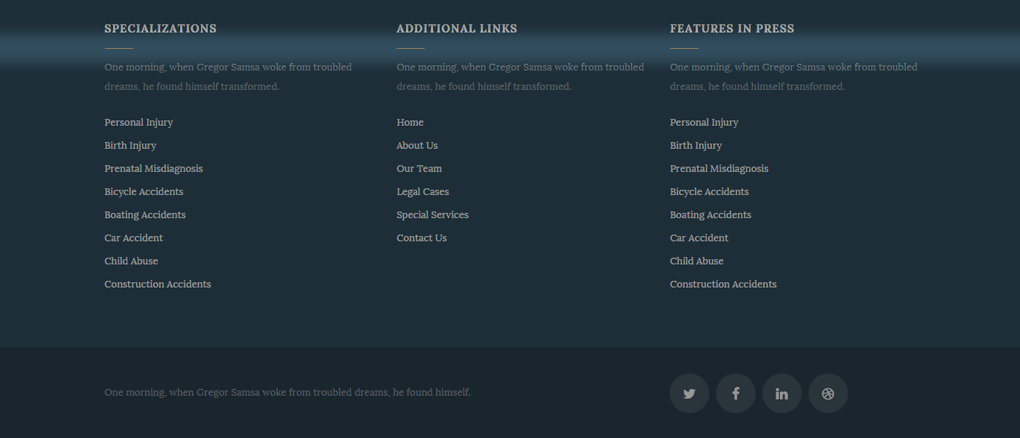
for small separator.
9.2.9.3 Button
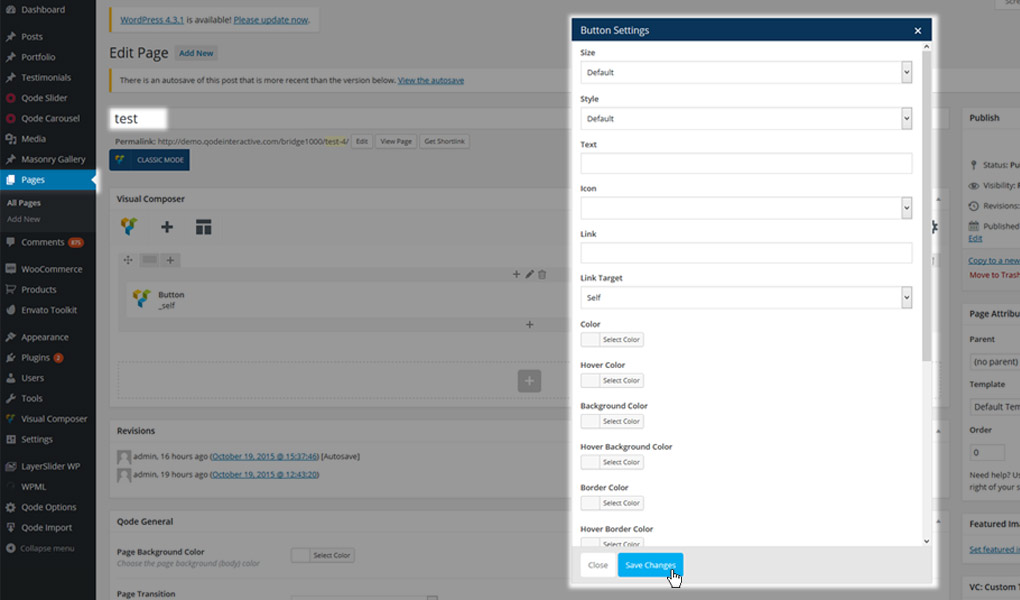
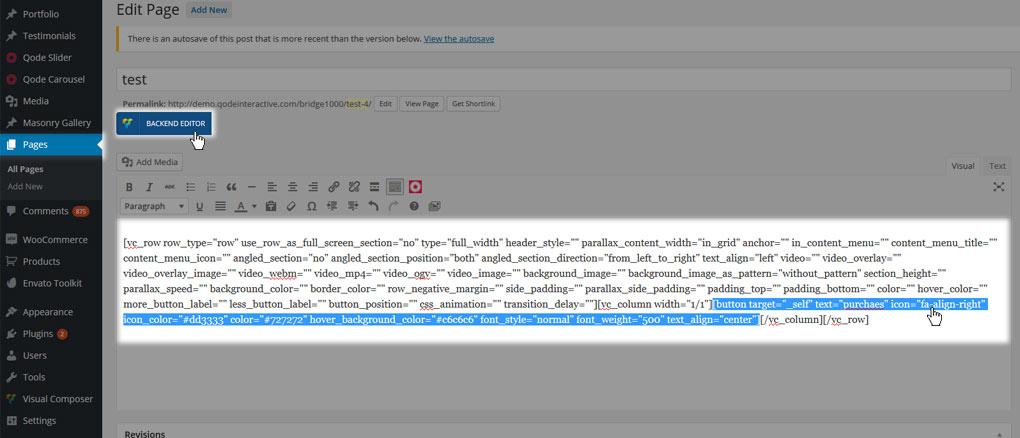
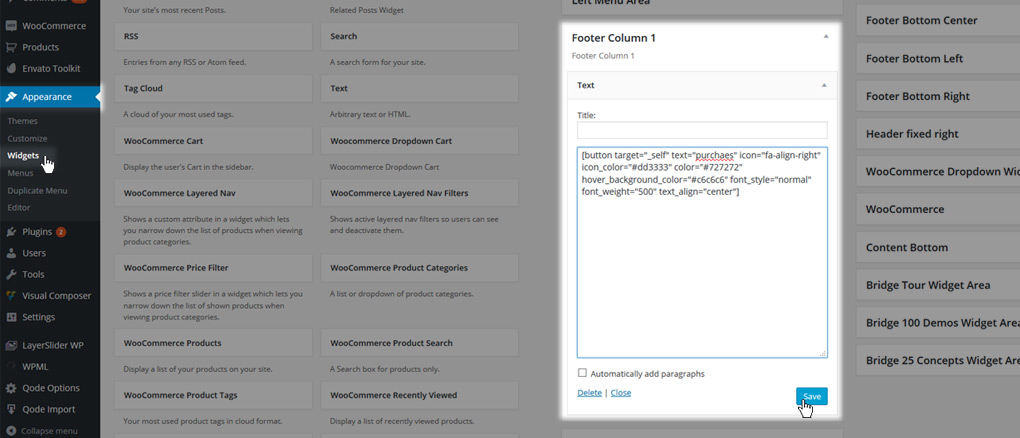
Another shortcode that can come in handy in the footer area is the Button shortcode. Whether it be a basic button without any other content, or button used with additional text to create a Call to action element, this is how it’s created. Simply follow through these screenshots:
01 Create the shortcode on a test page -
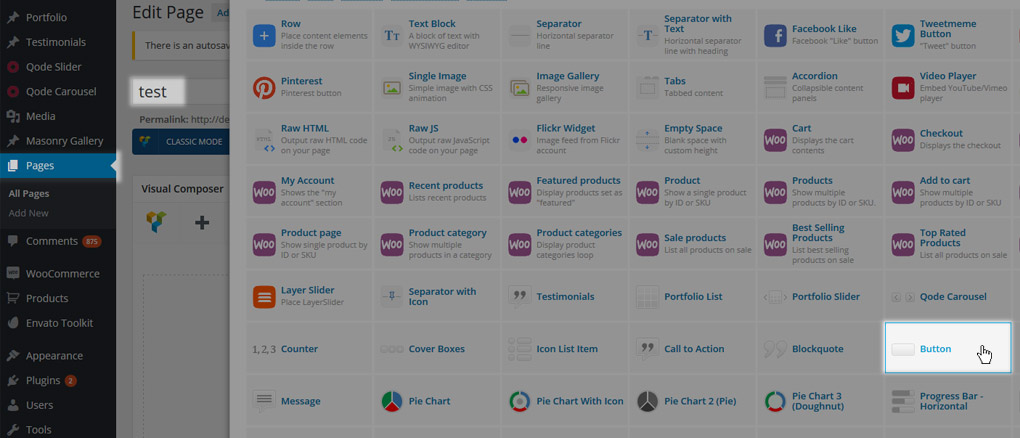
02 Switch back to Classic mode and copy the shortcode -
03 Navigate to WP Admin -> Appearance -> Widgets and paste the shortcode into a Text Widget placed into a widget area -
9.2.9.4 Adding Inline Menu
To add an inline menu to the very bottom of your page simply navigate to WP Admin -> Appearance -> Widgets and paste the following HTML into a Text widget in one of the widget areas:
<a style="margin-right: 13px;" href="http://demo.qodeinteractive.com/bridge65/">Home</a>
<a style="margin-right: 13px;" href="http://demo.qodeinteractive.com/bridge65/about">About</a>
<a style="margin-right: 13px;" href="http://demo.qodeinteractive.com/bridge65/shop-products">Shop</a>
<a style="margin-right: 13px;" href="http://demo.qodeinteractive.com/bridge65/blog-page">Blog</a>
<a style="margin-right: 13px;" href="http://demo.qodeinteractive.com/bridge65/contact">Contact</a>
We recommend that you let this serve as placeholder layout and modify the href attributes to match the links to your existing pages and enter the corresponding labels.
Here’s how the end result will look like -

9.3 Final Notes
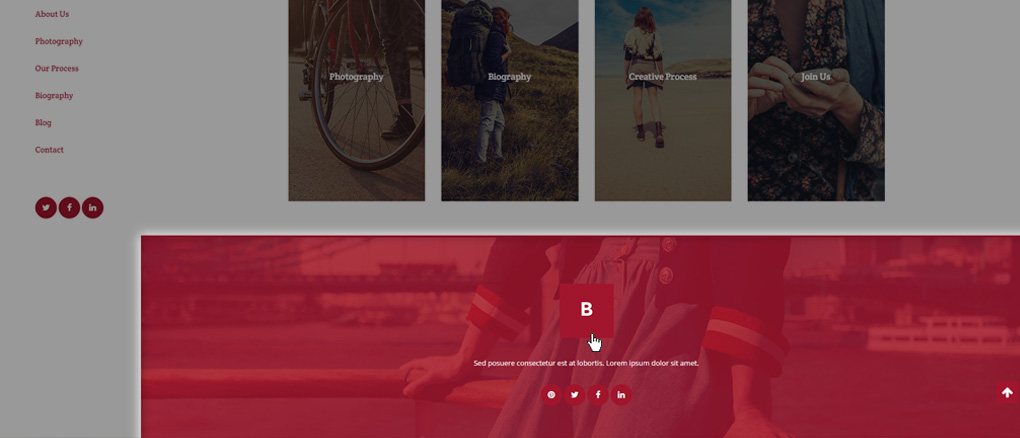
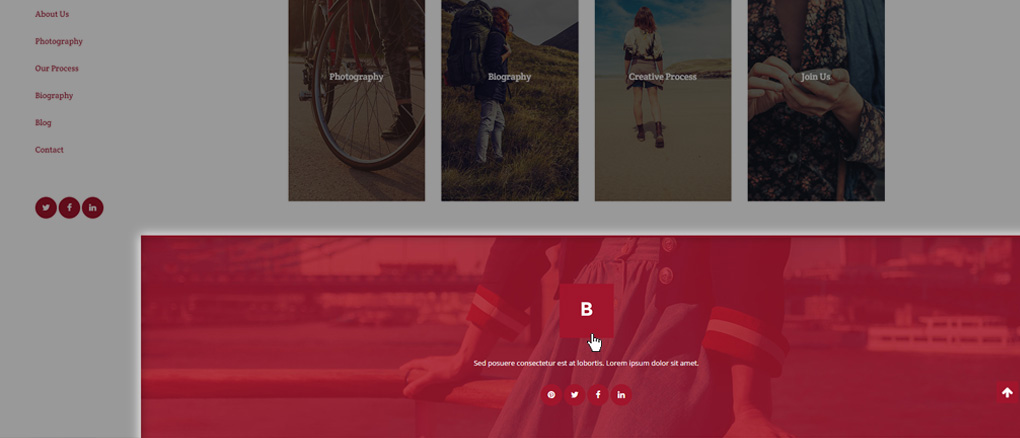
If you’re using the Full Screen Sections page template, the footer area won’t be displayed. Instead, you should create it manually in the last full screen section on your page,
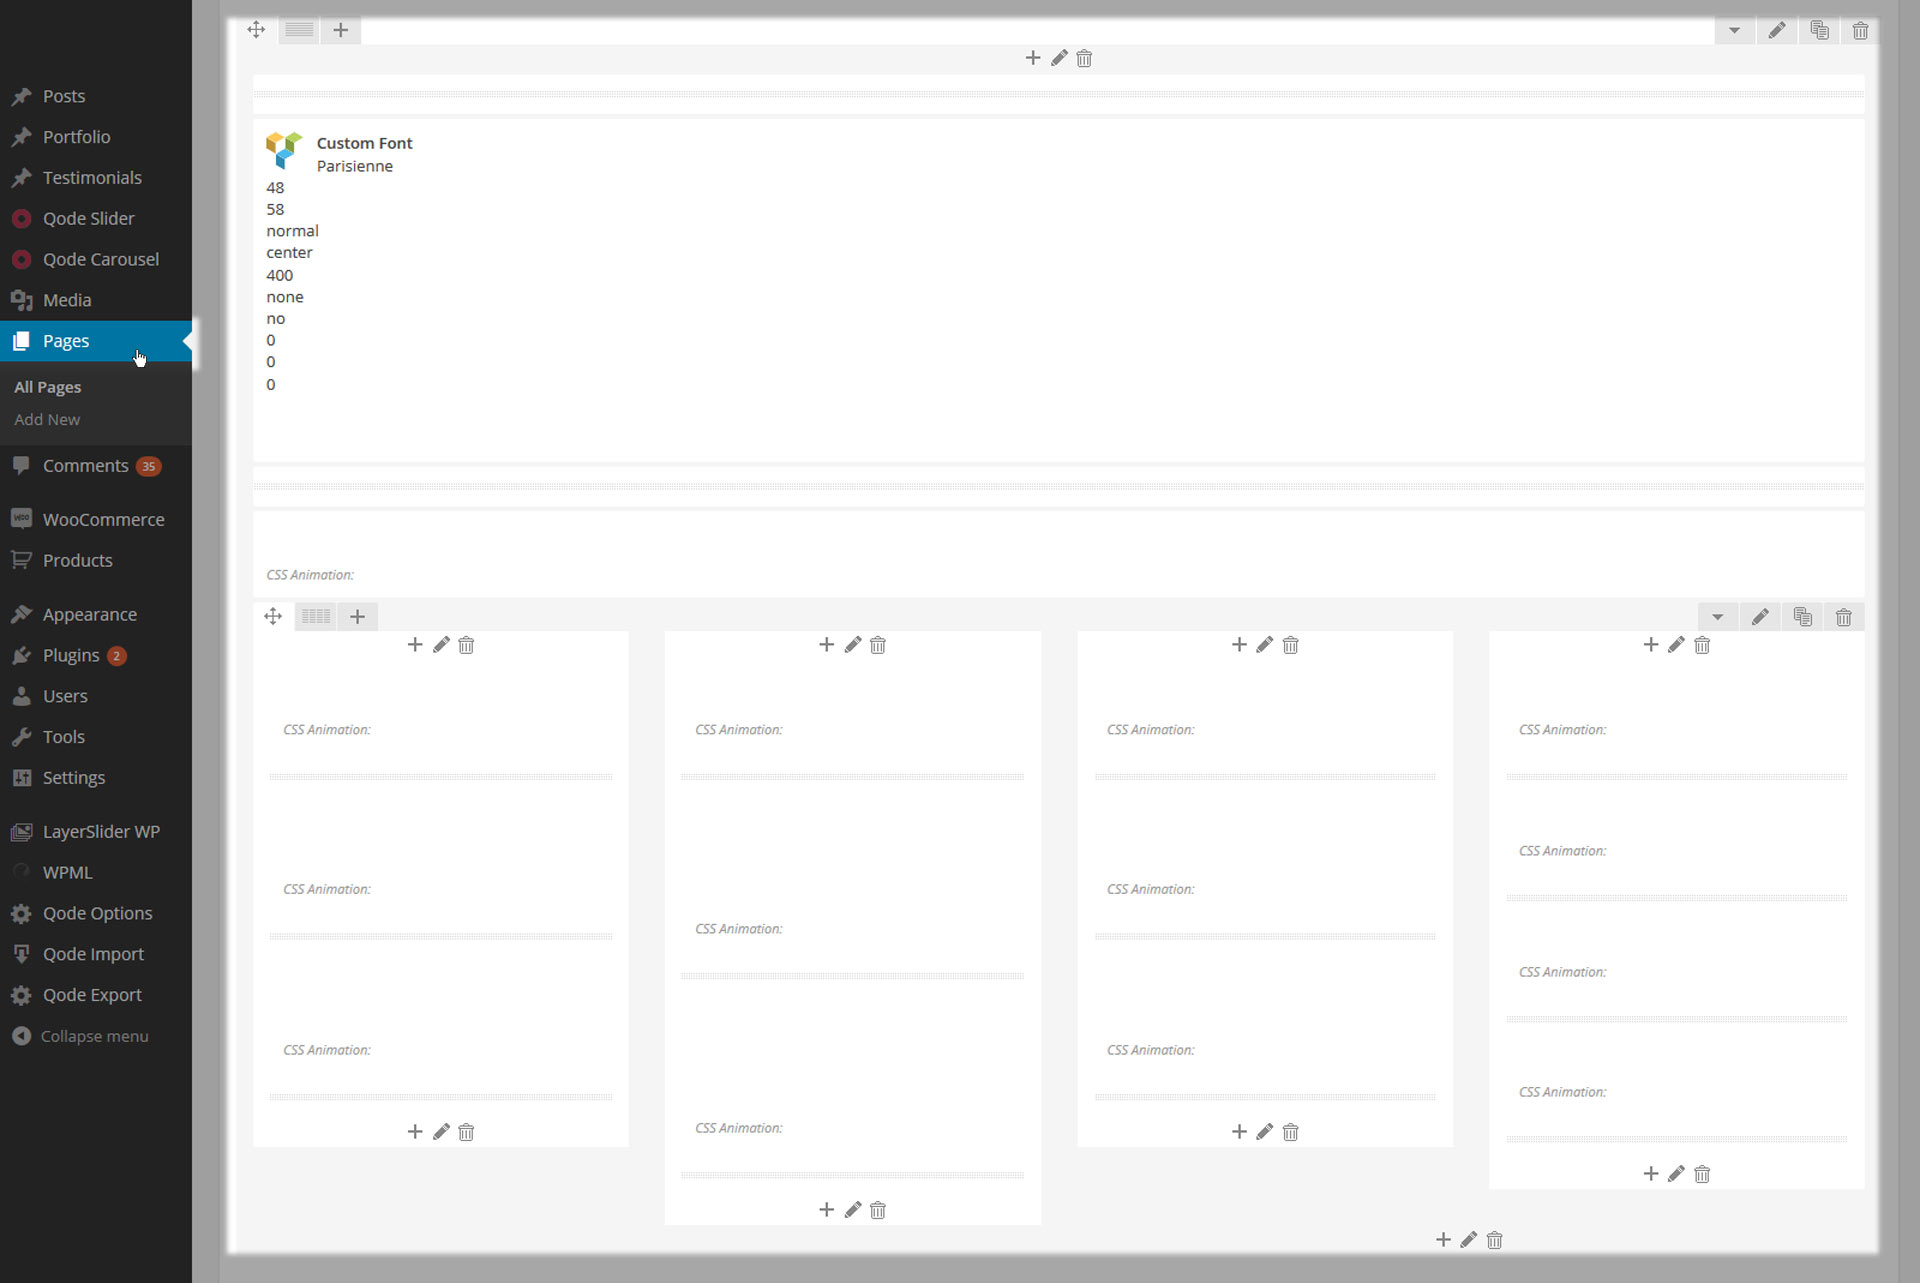
as we did on this demo. It’s important to know that none of the options from Qode Options -> Footer will be applied to this new footer area.
When you are copying and pasting HTML shortcodes to a text widget in one of the footer widget areas, please double-check the opening and closing tags. Due to improper HTML structure unwanted layouts can appear.


