Testimonials can be used to showcase your customer’s opinions about you or your business. Testimonials are implemented as a Custom Post Type in the Bridge theme.
13. Testimonials
13.1.Testimonials
Like all post types in WordPress, Testimonials contain Posts and Categories. Each Testimonials Post is actually a testimonial itself (named Testimonials), while categories are taxonomies you can assign your testimonials to (named Testimonials Categories).
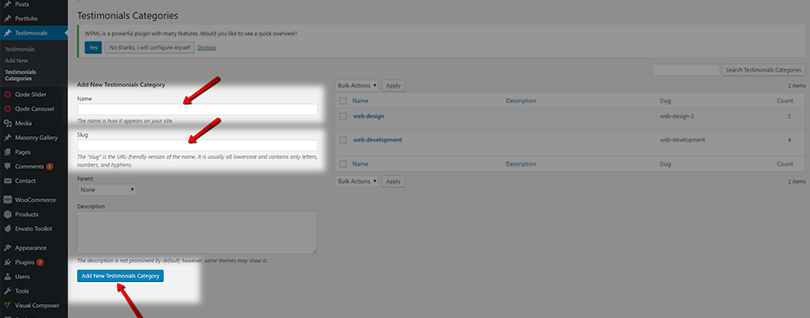
First, you will have to create some Testimonials Categories to assign your testimonials to. To create a category, navigate to Testimonials -> Testimonials Categories and fill out the Name and Slug fields and then click the Add new Testimonials Category button.
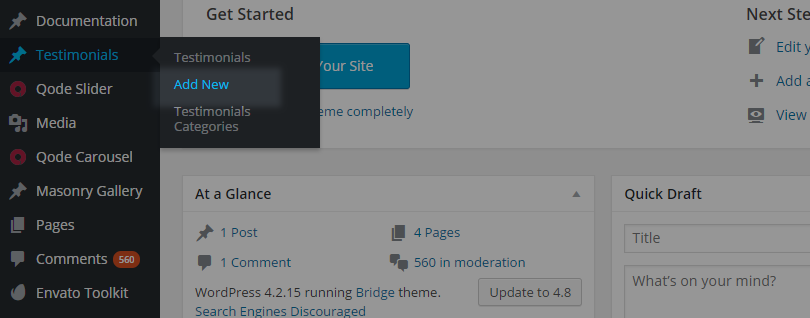
After you create your categories, you can assign testimonials to them. To create a new testimonial, navigate to Testimonials > Add new.
Here you can set up your Testimonials. The first field near the top of the screen is for the name of the Testimonial post. This is like the main title of the testimonial.
Here are what the other available fields are used for:
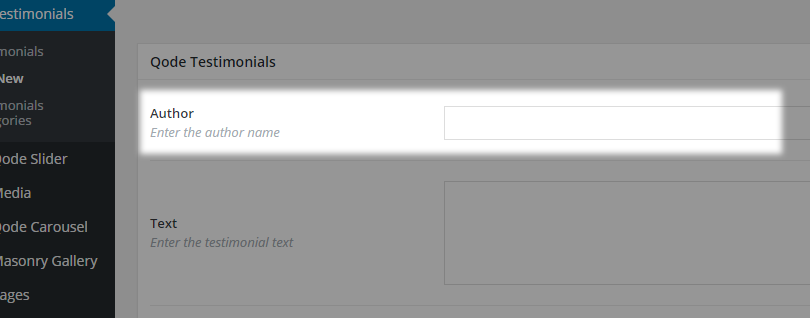
Author - The name of the testimonial’s author.
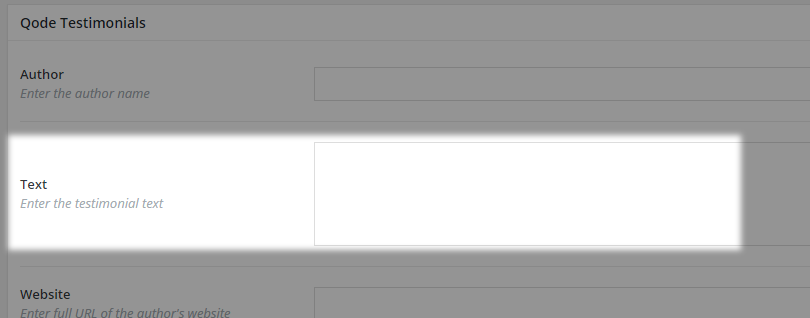
Text - The main text of the testimonial.
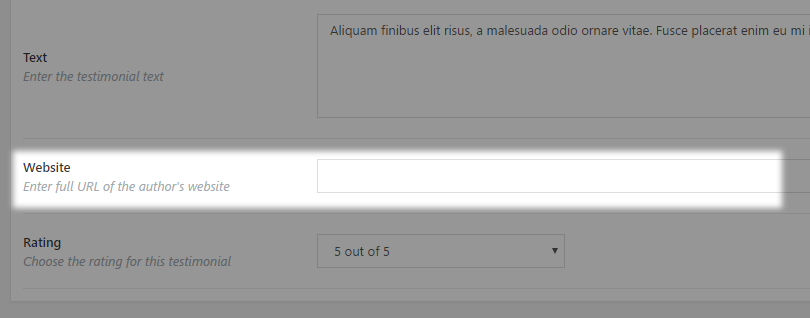
Website - Here your can optionally add the testimonial author’s website.
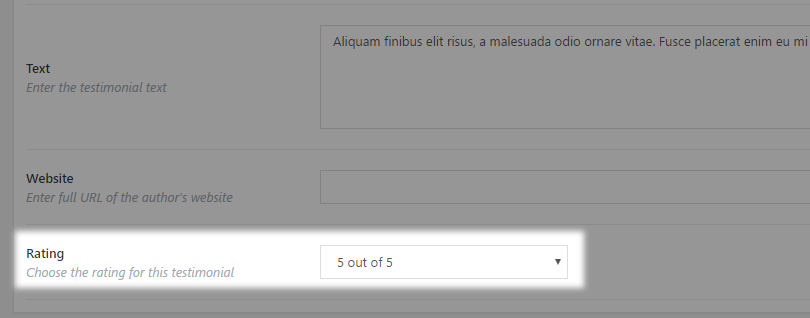
Rating - The rating the author gave your business.
On the right side of the screen you will see the Testimonials Categories and Featured image sections. In the Testimonials Categories section you can choose to assign your post (Testimonial) to some of the categories you've created previously.
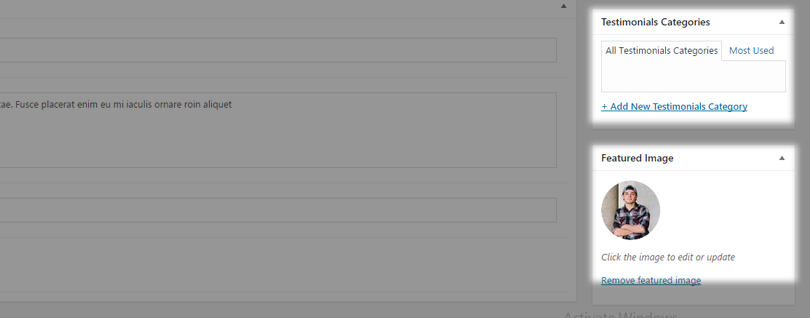
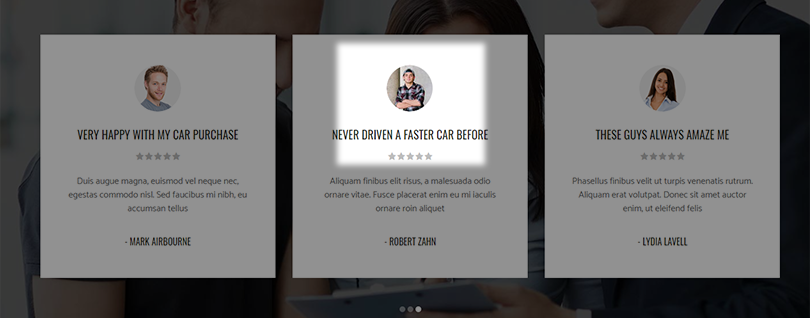
The Featured Image section will represent the image you've chosen when the Testimonials are being displayed in frontend. Every testimonial will have it's own image if you set it.
13.2.Testimonials shortcode
After you've created your Testimonials, you have to choose how you would like to present them on your website. One of the available solutions is to use the Testimonials shortcode. After you've added this element to your page, you will be able to see its settings. Here you can set your Testimonials element's behaviour
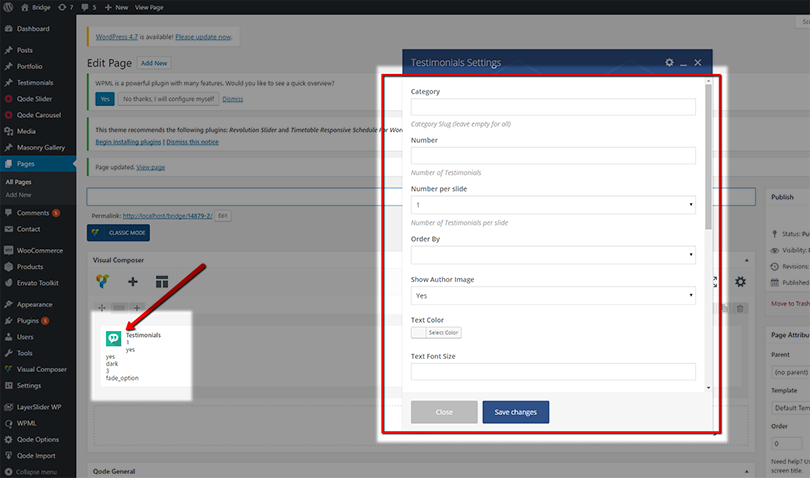
Here are what each of the options in the Testimonials shortcode is for:
- Category - If you would like to display only testimonials from certain categories, here you can input the slugs of those categories which you would like to display. Delimit the category slugs with a comma. If you would like to display all testimonials from all categories, leave this field empty.
- Number - Set the number of Testimonials to display
- Number per slide - Set the number of testimonials to display per slide
- Order By - Here you can set an order by Title, Date or Random. If you choose one of the first two solutions, you will get an additional field named Order Type, where you can choose whether you want your ordering to be ascending or descending.
- Show author image - If set to yes, this will show the featured image you've set in your Testimonials.
- Text Color - Set the color of the description text
- Text Font Size - Set the size of the description text
- Author Text Font Weight - Set the font weight for the author's name
- Author Text Color - Set a text color for the author's name
- Author Text Font Size - Set a font size for the author's name
- Show Navigation - If set to yes, this option will display navigation below your testimonials section.
- Navigation Style - Here you can choose between a light and dark skin for the navigation, depending on your site design.
- Auto rotate slides (sec) - Here you can choose how many seconds you want your slider to stay on a particular slide. After that period, it will switch to another slide.
- Animation type - Here you can choose between a fade and a slide animation type. This animation will be used to switch between testimonials.
Animation speed - Set the speed for the animation you set as Animation Type in milliseconds (1000 milliseconds = 1 second).
13.3.Testimonials Carousel Shortcode
Yet another solution for presenting your Testimonials is the Testimonials Carousel Shortcode which is similar to the previous Testimonials Shortcode element, but the design is slightly different.
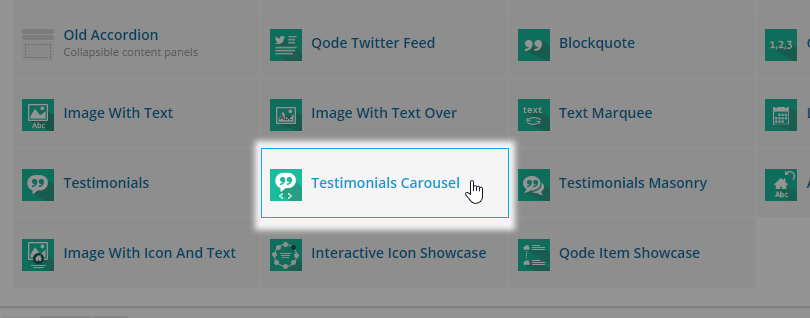
After you've added this element, you will see its options as usual
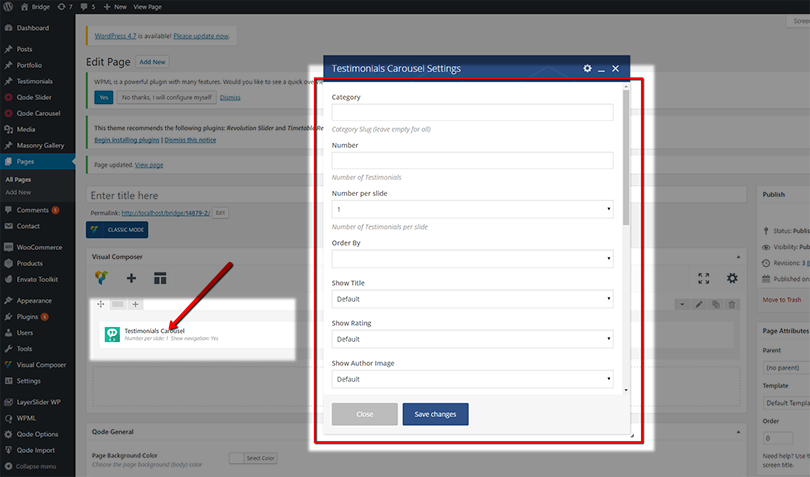
Here is what each of these options does:
- Category - If you would like to display only testimonials from certain categories, here you can input the slugs of those categories which you would like to display. Delimit the category slugs with a comma. If you would like to display all testimonials from all categories, leave this field empty.
- Number - Set the number of Testimonials to display.
- Number per slide - Set the number of testimonials to display per slide.
- Order By - Here you can set an order by Title, Date or Random. If you choose one of the first two solutions, you will get an additional field named Order Type, where you can choose whether you want your ordering to be ascending or descending.
- Show Title - Choose whether to to show the title of the Testimonials post.
- Show Rating - Choose whether to display the user rating set in the Testimonials post.
- Show Author Image - Choose whether to show the featured image you've set for the Testimonial post.
- Text Color - Set a color for the description text.
- Text Font Size - Set a font size for the description text.
- Author Text Font Weight - Set a font weight for the author's name.
- Author Text Color - Set a color for the author's name.
- Author text Font size (px) - Set a font size (in pixels) for the author's name.
- Show Navigation - If set to yes, this will display navigation for easier switching between testimonials.
- Navigation Style - You can choose between a light and dark skin, depending on your site design.
- Slideshow Interval (sec) - Here you can choose how many seconds you want your slider to stay on a particular slide. After that period, it will switch to another slide.
- Animation speed - Set a speed for the animation in milliseconds (1000 milliseconds = 1 second).
13.4.Testimonials Masonry Shortcode
Another way to display your testimonials is to use the Testimonials Masonry shortcode, which is a bit different from the previous solutions, because of a beautiful Masonry layout. This layout has its certain form which also has some limitations. For example, it can accept only a small amount of textual content for each testimonial. It requires using the Full Width page template. Also, there should be 8 testimonials in order for the element to be displayed properly. The number of testimonials is hardcoded to 8, so even if there are more than 8 testimonials, only 8 will be displayed.
On some smaller screen sizes, only 4 testimonials will be displayed. The idea behind this is that all testimonials should be visible on the page.
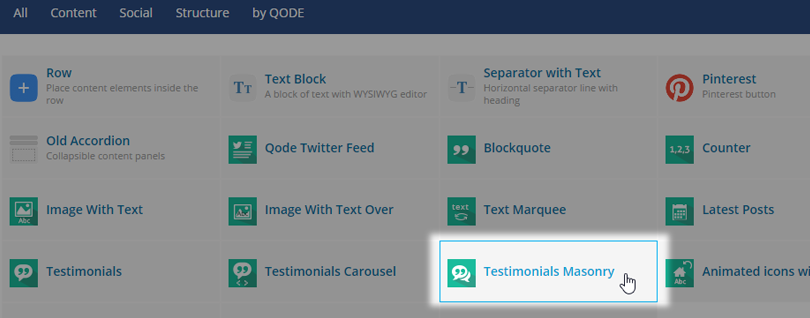
After you've added the Testimonials Masonry shortcode to a page, you will see its options.
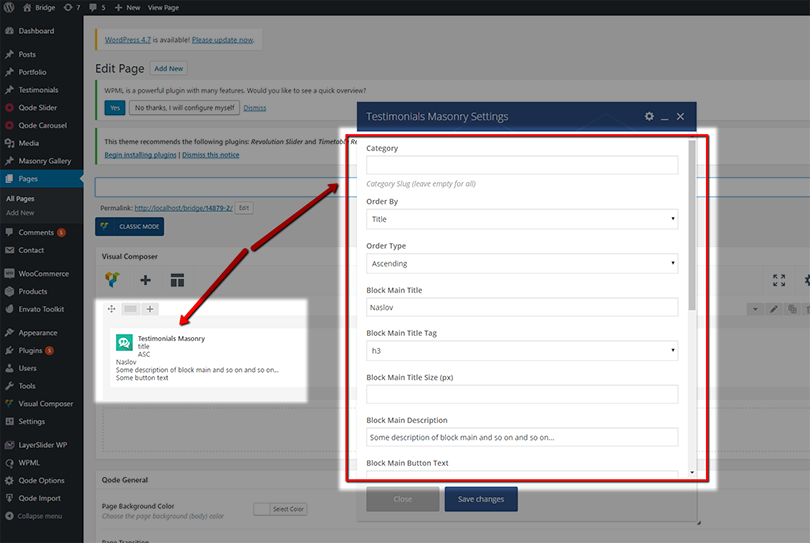
Here is what each of them does:
- Category - If you would like to display only testimonials from certain categories, here you can input the slugs of those categories which you would like to display. Delimit the category slugs with a comma. If you would like to display all testimonials from all categories, leave this field empty.
- Order By - Here you can set an order by Title, Date or Random. If you choose one of the first two solutions, you will get an additional field named Order Type, where you can choose whether you want your ordering to be ascending or descending.
- Block Main title - Set a title for the whole Testimonials section.
- Block Main Title Tag - Here you can choose a heading tag for the title.
- Block Main Title Size (px) - Set a size (in pixels) for the title.
- Block Main Description - Input a description for the Testimonials section.
- Block Main Button Text - Input the text for the button.
- Button Background Color - Here you can pick the color for the button.
- Button Link - Here you can input the web address which you would like your button to take visitors to when clicked on.
- Show Author Image - Set this option to “Yes” to show the featured images you set for your Testimonials.
- Title Tag - Set a heading tag for the testimonial titles.
- Title Size (px) - Set a size (in pixels) for the Testimonials title.
- Testimonial Background Color - Set a background color for the testimonials.
- Author Size (px) - Set a size for the author’s name.
13.5.Global Testimonial Options
The Bridge theme offers even more possibilities to customize the layout for your Testimonials. In Qode Options > Elements > Testimonials you will finds several fields that let you customize the look of your testimonials. Here is what these options do:
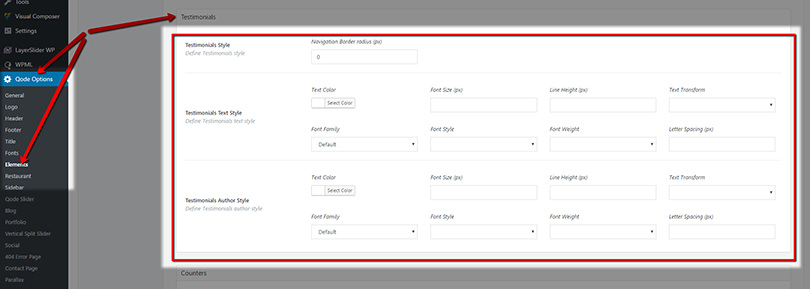
- Testimonials Style
- Navigation Border Radius - This field will will apply a radius to your Testimonials navigation (see 13. 2). If you input 0, the border around your navigation arrows will be squared, if you input 50 it will be circles.
- Testimonials Text Style - Here you can set styles for your testimonials’ main text (this applies to the Testimonials shortcode - see 13.2)
- Text Color - Here you can set the color of the text.
- Font Size - Set the size (in pixels) of the text.
- Line Height - Set a line height for the text.
- Text Transform - This option lets you perform some transformation of the text (Uppercase will set all the letters to uppercase disregarding the way you entered them. Lowercase will do the opposite, and Capitalize will set every first letter of each word to a capital letter.
- Font Family - Choose the font for the text (the default font is Raleway).
- Font Style - Here you can make your font italic if the font supports that feature.
- Font Weight - Set a font weight (boldness) for the font.
- Letter Spacing - Set a distance between letters in the text.
- Testimonials Author Style - Here you can set styles for the author name in your testimonials (applies to Testimonials shortcode - see 13.b.)
- Text Color - Here you can set the color of the text.
- Font Size - Set the size (in pixels) of the text.
- Line Height - Set a line height for the text.
- Text Transform - This option lets you perform some transformation of the text (Uppercase will set all the letters to uppercase disregarding the way you entered them. Lowercase will do the opposite, and Capitalize will set every first letter of each word to a capital letter.
- Font Family - Choose the font for the text (the default font is Raleway).
- Font Style - Here you can make your font italic if the font supports that feature.
- Font Weight - Set a font weight (boldness) for the font.
- Letter Spacing - Set a distance between letters in the text.
NOTE: You should know that some of those settings are going to be overridden by the shortcodes settings if you define them. (e.g. If your text color is set to green in your shortcode and red in Qode Options, it will be green).


