You can either start building your site from scratch, or import one of our demo sites and use it as a solid starting point in creating your original site content.
3. Demo Content
Each Bridge demo site has a distinctive name which is of great importance when it comes to importing demo content. To find out which demo to import, please go to our main demo page and hover over the demo you’re going to use - a title will appear:
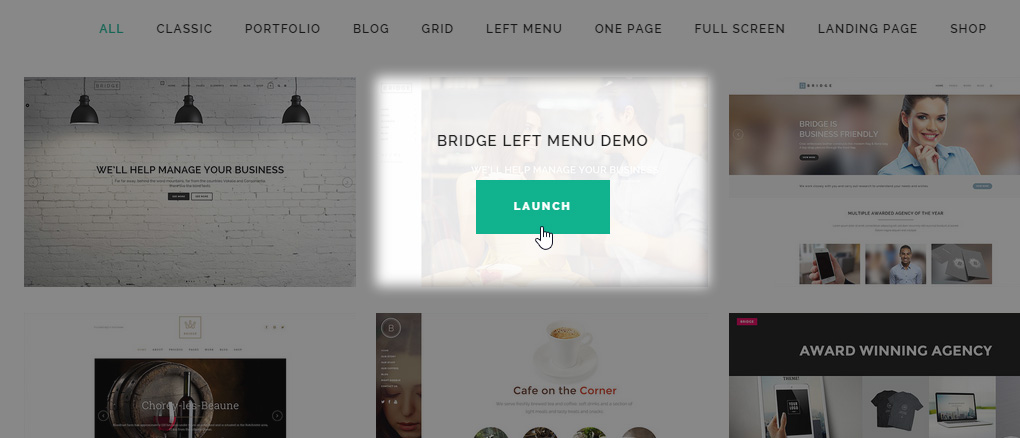
After the ‘Bridge’ title prefix comes the actual demo title. In this case it is ‘Left Menu Demo’. This is the demo you’re going to look for in the One-Click Import module.
Also, please note that each demo is numbered. When you click to preview a demo you’re going to use later on, a number will come up as a suffix to the URL in the address bar:
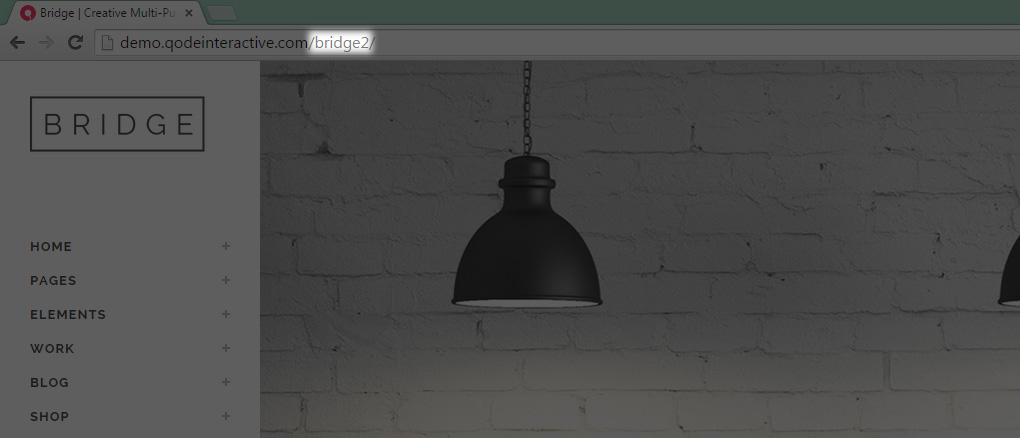
In this case it is ‘Bridge 2’. This is the XML file you should look for if you choose to import a demo as XML.
Note: To double-check you’re importing the right demo simply cross-reference the demo featured image in the Qode Import section with the landing page of the actual demo.
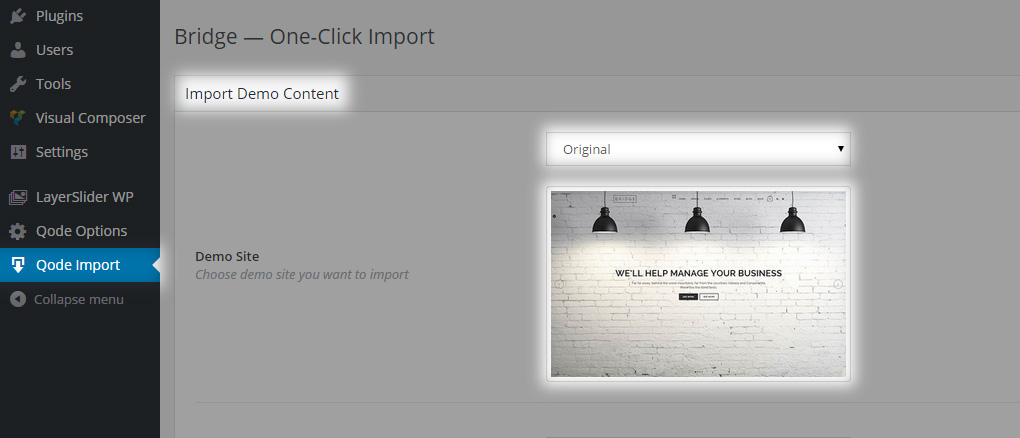
In order to import demo content related to the WooCommerce plugin i.e. the Shop part of our theme, you should install and activate WooCommerce before importing a demo.
3.1 Bridge One-click Import
Note:If you already have demo content imported on your site and would like to import a new demo, you should be careful of the following:
01Before importing new demo content, you should always navigate to Appearance > Menus and delete all imported menus (all menus that you did not create from scratch yourself). If you do not do this your menus will duplicate on import, which can lead to further issues.
02If you are planning to import another demo, it is good practice to first clear your existing demo using the WordPress Database Reset plugin (please note that this plugin will clear all WP content, basically reverting your site to the point when you just installed a fresh copy of wordpress).If you are using multisite, please use this plugin carefully because it can reset all network installations.
DEREGISTRATION.Please note that if you used your purchase code on one installation, you are required to Deregister in order to use the purchase code on a different installation
03All options that were imported with the demo you currently have active on your site will be overwritten with the options for the demo you intend to import. After import, go to Qode options and hit Save Changes. In this way you will make sure that all options are properly loaded.
Theme Activation and Registration
In order to activate your copy of Bridge, you should input your purchase code and email address, and thus effectively register the theme. To do this, please navigate to Bridge Dashboard > Bridge Dashboard and input the required information there.
You can obtain your purchase code by following these steps:
- Log into your Envato Market account.
- Hover the mouse over your username at the top of the screen.
- Click ‘Downloads’ from the drop-down menu.`
- Click ‘License certificate & purchase code’ (available as PDF or text file).

Note that you are not required to separately register any of the plugins which came bundled with the theme.
You should also make sure to activate and register your copy of the theme before proceeding to the demo import process.
It is also a good practice to refer to the System Info section to see if your server resources match the theme requrements. Navigate to Bridge Dashboard > System Info and there you will find a general overview of your server configuration, as well as the theme information and an overview of all the active plugins. In System Information any parameters that do not meet the theme requirements will be shown in red, and you can also see the recommended values that you should set next to them. If you are unsure how to adjust the server resources, you can ask your hosting provider to perform this for you
Importing Demo Content
With the Bridge theme, you have the option to either start creating your site from scratch, or choosing to import one of the included demo sites to use as a starting point, and then modifying it to suit your needs. In this section we will explain how to do the latter.
Bridge comes with a one-click import module. To import one of the included demo sites, please follow these steps:
- Login to your WordPress admin panel
- Navigate to Bridge Dashboard > Import
- From the Importdropdown menu, choose the demo site that you would like to import. Note that you can look up demos by typing in a keyword in the top left, and filter demos by various categories.
- From the Import Typedropdown menu, choose what type of content you'd like to import:
- All- imports pages, content, widgets, and settings. We recommend this for users who would like to import a demo site exactly as it appears on our live demo.
- Content - imports only pages and their content. This option is recommended for users who would like to see how we've created our page layouts, but who want to keep their own settings in Bridge Core Options.
- Widgets- imports only widgets. This option is recommended for users who would only like to populate the theme’s widget areas with the widgets from their chosen demo. No other content is imported.
- Options- imports settings in Bridge Core Options only. This option is recommended for users who would like to achieve the same look and feel of their chosen demo site, but do not want to import any additional content.
- If you also wish to import media files (images, videos, sounds), make sure to set the Import attachmentsoption to "Yes".
- Click on the Importbutton and wait for the import process to finish.

Please note that the images we use on our demo sites are copyrighted, and if you'd like to publish them on your site, you would need to purchase them separately. We bought most of our images on Shutterstock.
3.2 XML Import
You can also import a Bridge demo using the classic WordPress import and the Bridge XML files. To do so, first download the latest Bridge zip file from your ThemeForest downloads page and extract it. After this you should navigate to the demos folder, where you will locate the index file.

Upon opening the index file, you will be able to view each demo by launching it as well as to download your desired demo’s XML file from the list. Note that the XML files for each demo will be located inside zip files whose content you should extract after downloading them.

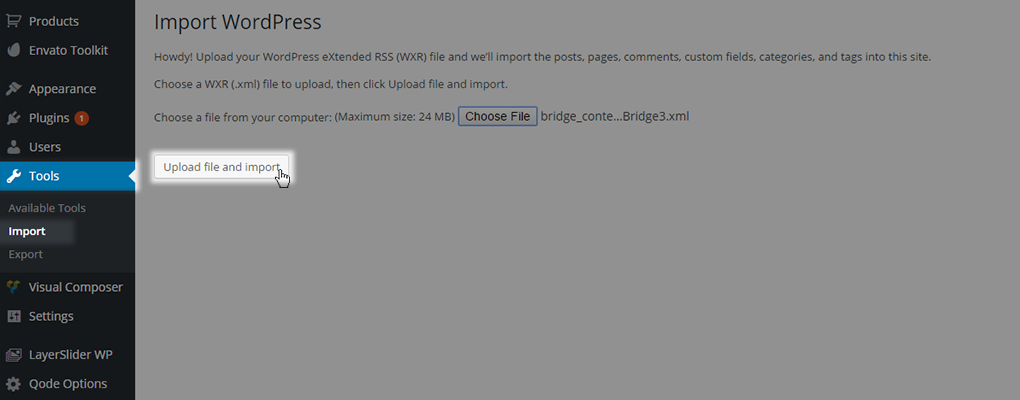
Then, navigate to WP Admin -> Tools -> Import, and select WordPress from the list. If needed, install the WordPress importer.

Click on Choose File, and navigate to the folder to which you have extracted the demo zip file that you previously downloaded from the Bridge XML Import Files list.
After you have chosen your desired XML file, just click the Upload file and import button, and wait for your import to finish.
3.3 Demo Import Tips and Tricks
Please note that you can only have one demo imported at a time - otherwise the content gets overridden and duplicated causing improper theme behavior. So, before importing a new demo we recommend running this plugin to revert WP to its original state and then re-activate our theme and import the demo.
You can easily combine various features from different demos. The suggested way of doing this is creating a WordPress local development environment with as many demo sites as you need to import the demos you’re looking to combine. Now you can safely take a look at the back-end of each demo that you’re going to use a feature from and either copy the necessary content or replicate a setting to your live site.
If you’re setting up your website locally, it is crucial to properly migrate to a live server. Here’s a clear instructions set that can help you perform a proper WP migration: http://www.wpbeginner.com/wp-tutorials/how-to-move-wordpress-from-local-server-to-live-site/
RELATED LINKS:
3.4 Importing Content for Plugins
Besides the standard theme demo content, certain Bridge demos also contain separate demo content related to the plugins the theme uses. In this section we will explain how to import this demo content.
3.4.1 LayerSlider
When importing a demo onto your site, the LayerSlider slideshow has to be imported separately.
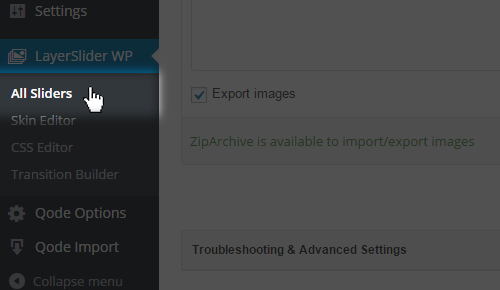
To import a LayerSlider slideshow from one of our demos, please go to your WP Admin -> Layer Slider -> Import.
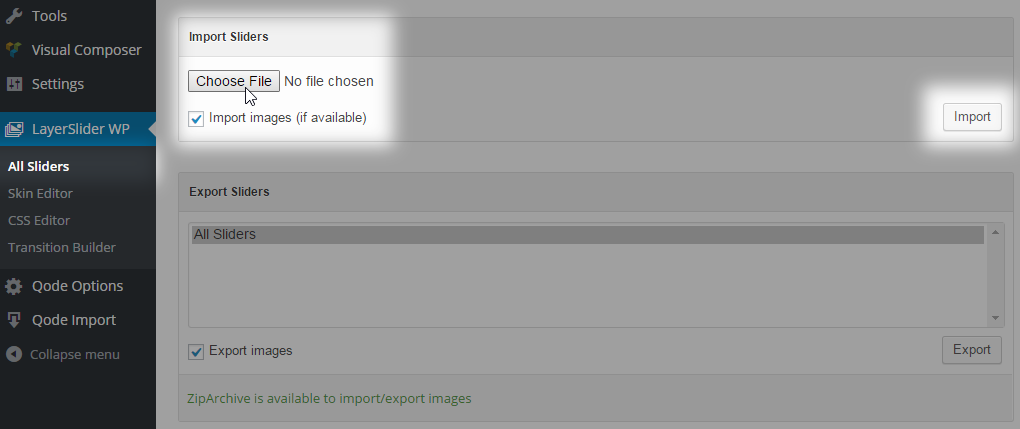
Search for LayerSlider_Export_BridgeN.zip* located in the file you downloaded from Theme Forest / XML export/layerslider folder and import the slideshows from that demo.
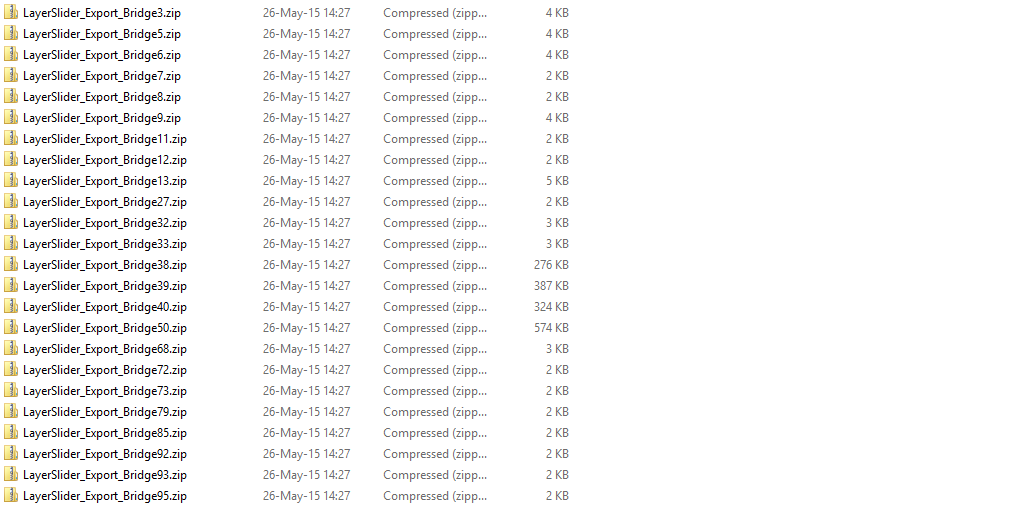
*N - corresponds to the demo number you imported
Finally, go to the page on your site where the slider is supposed to display and set the valid slider shortcode ID and save.
3.4.2 Contact Form 7
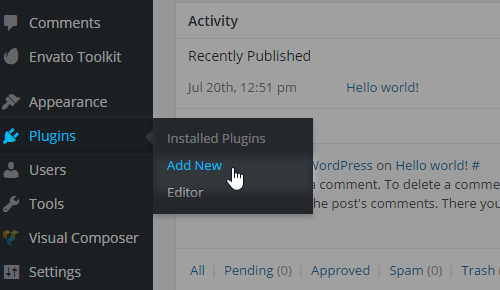
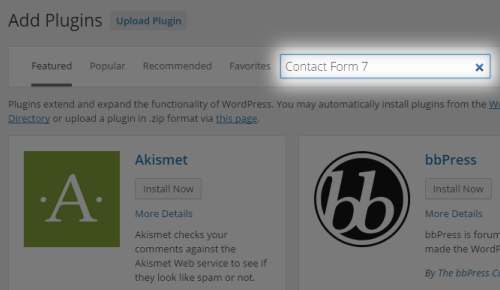
If you don't intend to use our default Contact Page template, we recommend that you install the Contact Form 7 plugin , that offers you an easy way to create different kinds of contact forms. To install this plugin, just go to Plugins -> Add New, and search for Contact Form 7. Install and activate it.
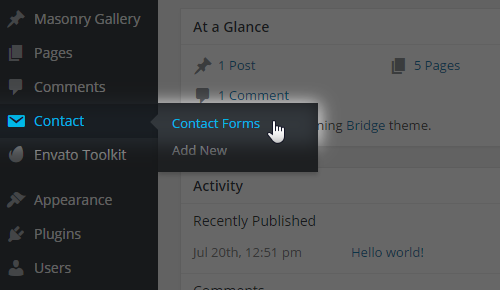
Before inserting a Contact Form 7 element via WPBakery on your page, inside your WP Admin Panel go to Contact, in order to create your form first.
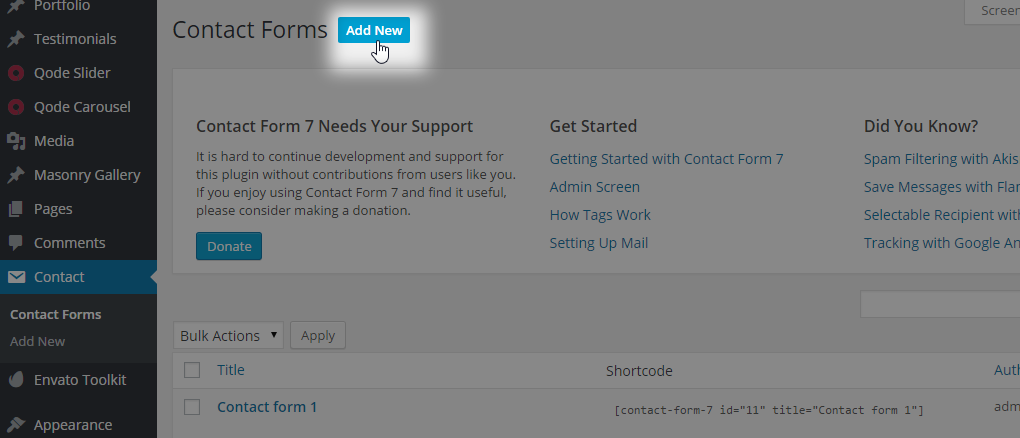
Click on the Add new button at the top, and once you have chosen the language you will be ready to build your custom contact form.
You can code your own form directly in the Form panel, or use one of our form examples from the Bridge demos in which forms have been created with this plugin :
01 Basic - one field in a row form (demo example http://demo.qodeinteractive.com/bridge93/contact-me/)
To create this kind of form paste this code in Form panel:
<p>[text* first-name placeholder  "Your Name*"]</p>
<p>[email* email placeholder  "Your Mail*"]</p>
<p>[text subject  placeholder "Subject"]</p>
<p>[textarea* message placeholder "Message*"]</p>
<p>[submit "CONTACT US"]</p>
02 Three input fields in a row with a textarea beneath them (demo example http://demo.qodeinteractive.com/bridge60/contact/)
<div class="three_columns clearfix">
<div class="column1">
<div class="column_inner">[text* first-name placeholder "First Name*"]</div>
</div>
<div class="column2">
<div class="column_inner">[text* last-name placeholder "Last Name*"]</div>
</div>
<div class="column3">
<div class="column_inner">[email* email 40/100 placeholder "Email*"]</div>
</div>
</div>
<p>[textarea* message placeholder "Message*"]</p>
<p>[submit "CONTACT US"]</p>
03 Four input fields split into two rows with a textarea beneath them (demo example http://demo.qodeinteractive.com/bridge75/contact/)
<div class="two_columns_50_50 clearfix">
<div class="column1">
<div class="column_inner">[text* first-name placeholder "First Name*"]</div>
</div>
<div class="column2">
<div class="column_inner">[text* last-name placeholder "Last Name*"]</div>
</div>
</div>
<div class="two_columns_50_50 clearfix">
<div class="column1">
<div class="column_inner">[email* email 40/100 placeholder "Email*"]</div>
</div>
<div class="column2">
<div class="column_inner">[text subject placeholder "Subject"]</div>
</div>
</div>
<p>[textarea* message placeholder "Message*"]</p>
<p>[submit "CONTACT US"]</p>
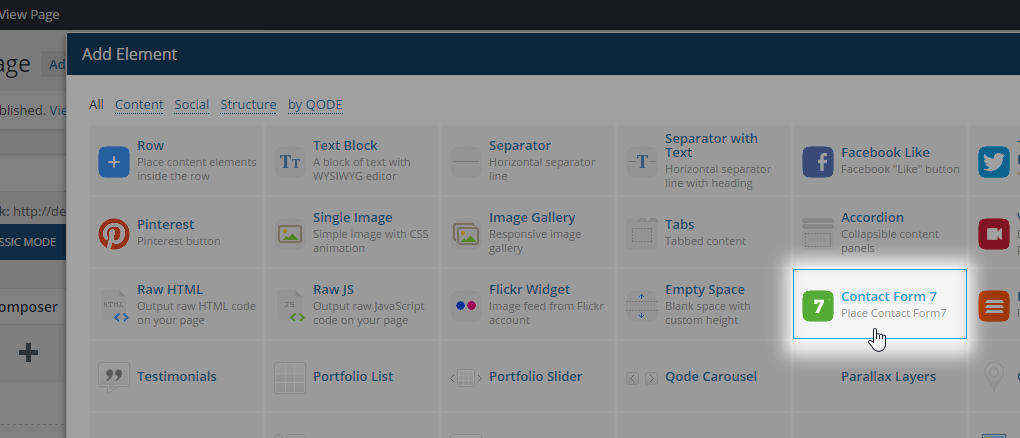
Once you have created your contact form, you are free to showcase it on any page, using Visual Composer. Choose the Contact Form 7 element, and you will get the option to choose which of your previously created forms you want to display. You can also choose to apply one of three predefined stylings for your form, that you are able to set in Qode Options -> Contact Form 7.
RELATED LINKS:
3.5 Common Issues and Troubleshooting
If you have experienced issues while importing one of the demos, we suggest that you refer to the following section of the owner’s manual in order to troubleshoot and solve any issues you might have come across.
3.5.1 Demo import stuck at 80%
Problem: If you’ve tried to import a demo content and the import process gets stuck at a certain percentage value this issue is most probably related to your server configuration.
Solution: We recommend that you undertake the following actions:
01 Run this plugin to revert your WP installation to its original state - https://wordpress.org/plugins/wordpress-reset/
Note: This will delete all content from your site.
02 Navigate to WP Admin -> Appearance -> Themes and activate Bridge
03 Disable all plugins you might have installed under WP Admin -> Plugins except WooCoomerce (If you plan to import shop demo files. If not, disable this plugin as well ).
04Make sure that you have not changed the location of the default Media folder. The default media folder is changed by editing the wp-config.php file, so if you have not made modifications to this file, your media folder should be set to the default one.
05 Increase post_max _size to 128M and max_execution_time to 300 in your php.ini file. You can find more information on how to do this in the related links below.
06 Increase PHP memory limit. You can find more information on how to do this in the related links below.
You can perform these server configuration modifications yourself or contact your hosting service provider to adjust this on your behalf.
07 Try to import the demo content again.
RELATED LINKS:
3.5.2 I’m seeing HTML code on the front-end of my site
Problem: On the front end of your site there’s HTML shortcode instead of images, portfolios, rows etc.
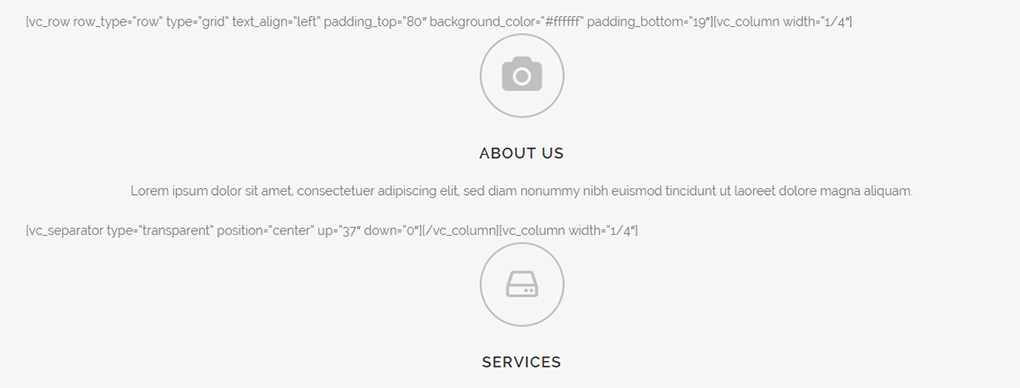
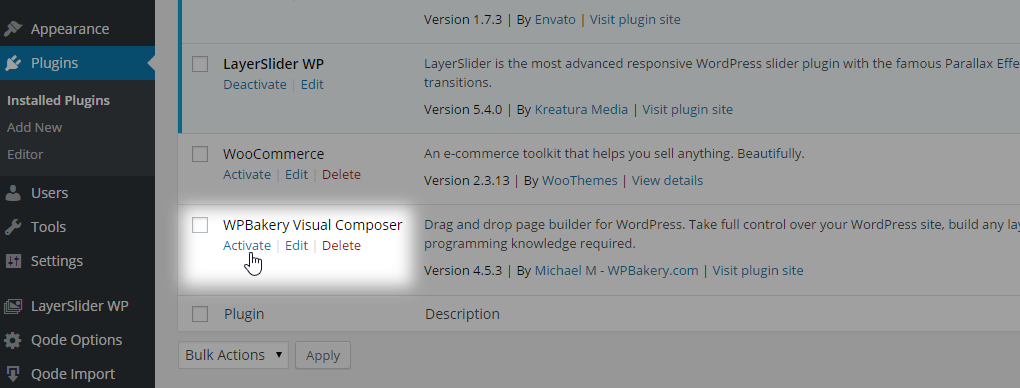
Solution: WPBakery is not activated. Please go to your WP Admin -> Plugins -> Installed Plugins and activate WPBakery Page Builder for WordPress:
RELATED LINKS:
3.5.3 StrStr PHP error
Problem: An error message appears
Warning: Wrong parameter count for strstr() in /home/content/m/i/s/missaaco/html/wp-content/themes/bridge/includes/shortcodes/shortcodes.php on line 1027
Solution: The PHP version you're using does not support the third parameter of the strstr function, hence the error message. Usage of the function requires PHP 5.3.0 or higher. You should contact your hosting service and ask them to upgrade to at least version 5.3 of PHP because many updates have been made made since PHP 5.2 version was released.
RELATED LINKS:
3.5.4 getimagesize error
Problem: An error message appears -
Warning:getimagesize() [function.getimagesize]: failed to open stream: No such file or directory in/your-server/public_html/wp-content/themes/bridge/title.php on line 85
Solution: You have not uploaded your original logos instead of the Bridge placeholder logos in WP Admin -> Qode Options -> Logo. Please navigate to this location in your WordPress admin panel and upload all logo images.
If the issue persists upon updating theme logo images, please submit a ticket to our support team at https://helpcenter.qodeinteractive.com/hc/en-us for further assistance.


